 |
|||
|
|
|||
|
Page Title:
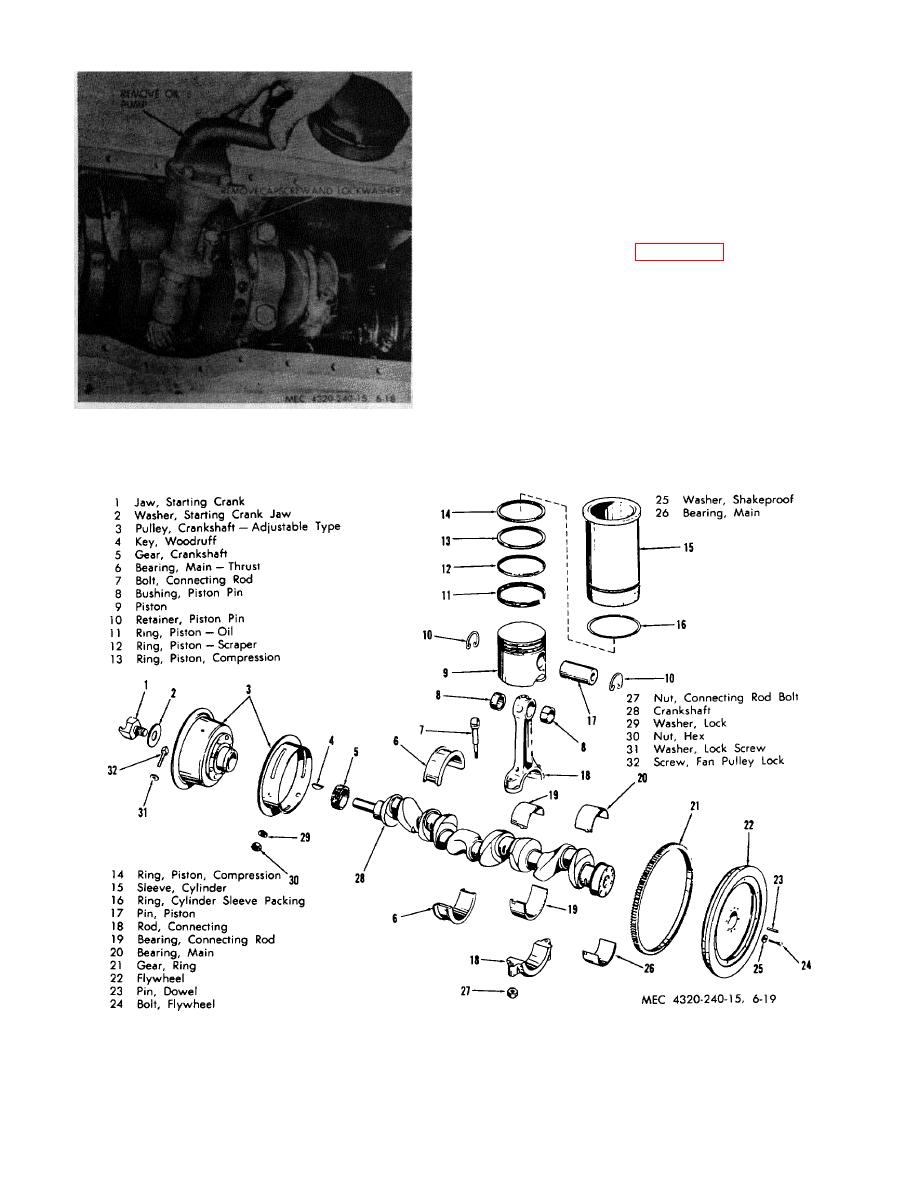
Figure 6-19. Crankshaft, pistons, connecting rods, bearings |
|
||
| ||||||||||
|
|
 d. Cleaning, Inspection, and Repair.
(1) Clean all parts in an approved cleaning
solvent; dry with clean dry, compressed air.
connecting rods for cracks, distortion, scoring, pitting or
other defects. Replace piston rings and damaged or
defective parts.
(3) Refer to figure 6-20 and check piston fit
using a piece of 0.015 inch feeler stock cut 1/2 inch
wide. Dress the edge of the feeler stock with a stone to
remove burs and feathered edges. The block and
pistons must be at room temperature when piston fit is
tested. Position the feeler stock midway between the
piston pin bosses. With the piston and feeler stock
inserted about 2 inches into the sleeve the feeler stock
must pull from the block with 5 to 10 pounds pull. If the
feeler stock does not offer enough resistance, perform
same test with a new standard size piston. If sufficient
resist
Figure 6-18. Oil pump removal and installation.
Figure 6-19. Crankshaft, pistons, connecting rods, bearings.
6-17
|
|
Privacy Statement - Press Release - Copyright Information. - Contact Us |
