|
| |
TM 10-4320-324-14
6-11.
Crankcase Repair (CONT).
(i) Measure each bore at points 1 and 2 in the vertical and horizontal positions "a" and "b".
(j) If recordings show that bearing tolerances are up to 0.001 inch (0.020 mm) maximum above value specified
above, crankcase is acceptable for further use as is.
(5) Check bearing housing for alinement as follows:
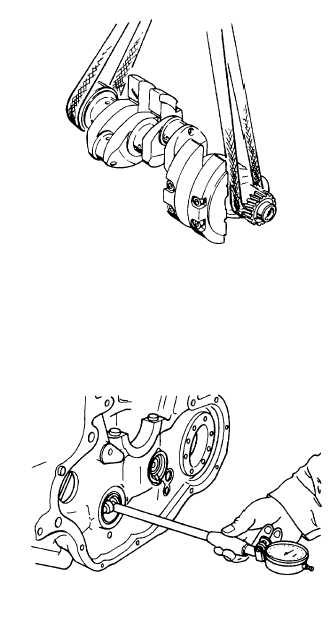
(a) Coat main crankshaft journals with marking ink.
(b) Place crankshaft in crankcase and install bearing
caps according to the numbering. Torque bolts
according to Appendix F, Table F-1.
NOTE
If all bearings have a uniform contact pattern,
bearings are in alinement.
Do not bore out individual bearings.
(c) Rotate crankshaft and then remove it. If bearing
bores are in alinement there will be an even
pattern of marking by crankshaft in all bearing
bores. If bearing bores require alinement, the
bores must be line-bored at a machine shop.
(6) Check cylinder liner seating on crankcase Touch the
surface and feel for any evidence of roughness.
Seating surface must be level and free from
grooves. If cylinder liner seat must be reworked,
refer to Repair.
(7) Measure camshaft bearing bores of crankcase using
an inside dial indicator. Bore should be 1.889-
1.8911 in. (47.980-48.034 mm). If bores are
excessive, replace bearings using the procedure in
Repair.
6-48
|

