 |
|||
|
|
|||
|
Page Title:
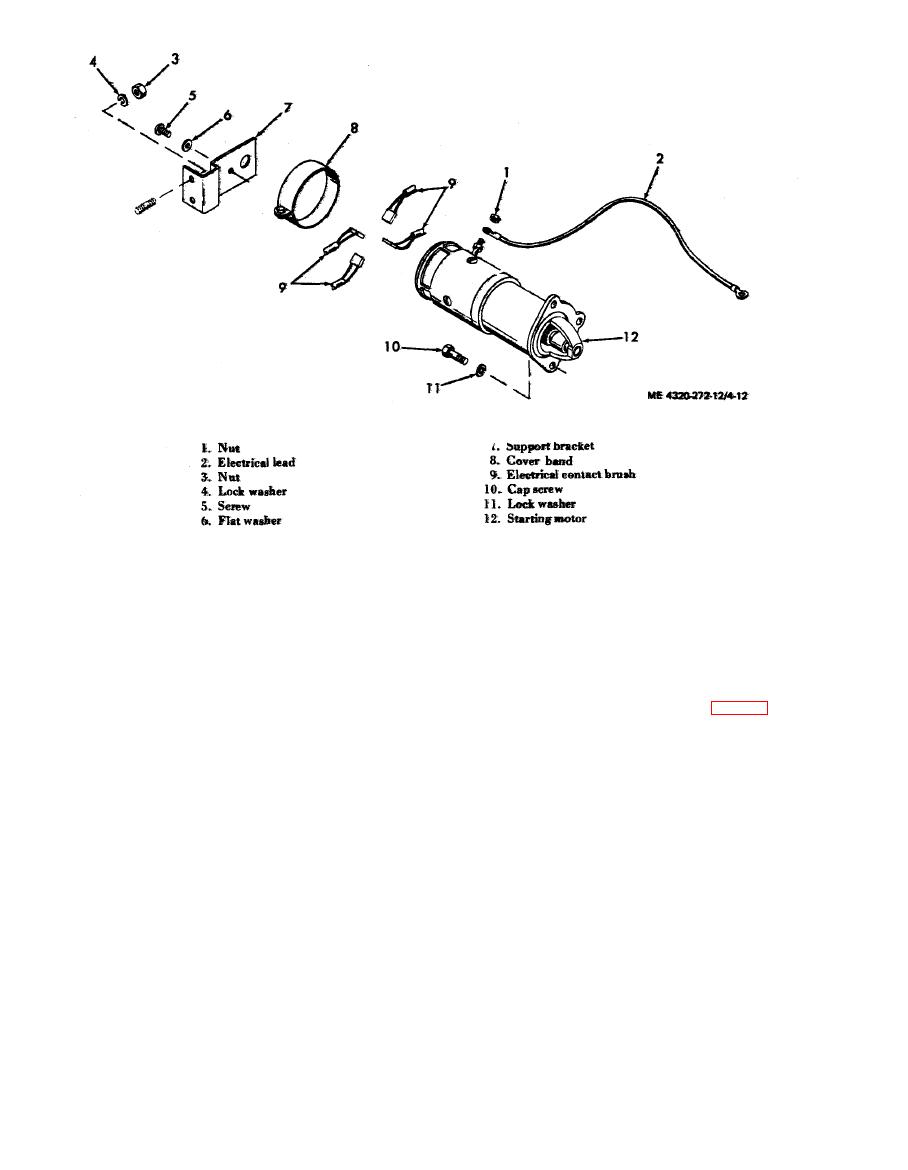
Figure 4-12. Starting motor and brush replacement, exploded view. |
|
||
| ||||||||||
|
|
 (4) Remove the brush cover band (8, fig. 4 -
(2) Remove the nuts (3) and lock washers (4)
12) and inspect the starting motor brushes; replace
that secure the support bracket (7) to the engine
if necessary (subparagraph c below).
block.
(5) Replace with a new starting motor if the
(3) Remove the screw (5) and flat washer (6)
old motor is damaged in any way.
that mount the support bracket (7) to the starting
c. Starter Brush Replacement. If inspection
motor; remove the support bracket.
shows you that the brushes are worn less than 3/8
(4) Remove the three cap screws (10) and
inch, replace them as follows:
lock washers (11) that secure the starting motor
(1) Disconnect the electrical lead (2, fig. 4-12)
(12) to the flywheel housing. Pull straight out on
to the starting motor from the starter switch.
the starting motor to remove it from the engine.
(2) Loosen the cover band screw and slide the
b. Cleaning and Inspection.
cover band (8) from over the brush access openings
WARNING
in the starter frame.
Clean all parts in a well-ventilated area.
(3) Unhook the spring retaining each brush
Avoid inhalation of solvent fumes and
and hold it out of the way of the brush. Holding the
p r o l o n g e d exposure of the skin to
cleaning solvent. W a s h exposed skin
brush by the leads, carefully remove brush through
access opening. Remove brush only far enough to
thoroughly.
disconnect brush leads from field leads. Repeat this
(1) Clean the exterior of the starting motor
procedure with each brush.
with a cloth dampened with cleaning solvent (fed.
spec. P-D-680). When you use solvent, take care to
NOTE
prevent it from entering the starting motor.
Before you install the new brushes, check the
(2) Inspect the starting motor for cracks, signs
commutator on the armature shaft. It must be
of overheating, and other damage.
smooth and concentric, free from burrs, scoring, high
(3) Inspect the starting motor drive for worn,
segments, or other damage. Replace the starting
chipped, and broken gear teeth, and other broken
motor if the commutator is damaged.
parts.
|
|
Privacy Statement - Press Release - Copyright Information. - Contact Us |
