 |
|||
|
|
|||
|
Page Title:
Fuel Tank, Bracket, Fuel Strainer, Line and Fittings |
|
||
| ||||||||||
|
|
 TM
10-4320-202-15
b. Clean and Inspect.
(1) Clean all parts with approved clean-
ing solvent. Flush solvent through the air
c l e a n e r element in the body until fresh
solvent is noted as it passes through the ele-
ment. Remove all solvent from element by
shaking or use of low pressure air.
Note. The air cleaner element is permanently
installed in the air cleaner body. Do not attempt to
remove it.
(2) Inspect air cleaner body for cracks,
severe dents, or other damage.
(3) Inspect all other associated parts for
cracks, distortion, or other damage. Replace
all damaged parts.
3-27. Fuel Tank, Bracket, Fuel Strainer,
Line and Fittings
a. Removal. Remove the fuel tank, bracket,
fuel strainer, fuel line and fittings (fig. 36).
b. Cleaning and inspection.
(1) Clean all parts with approved clean-
ing solvent and dry thoroughly.
(2) Inspect the fuel line for restrictions,
c r a c k s , dents or other damage that would
cause a resultant reduced flow of fuel to the
engine.
(3) Inspect the fuel tank for leaks, severe
dents, worn or damaged threads.
(4) Inspect the fuel tank cap for proper
fit and unobstructed breather orfice.
(5) Inspect the fuel strainer parts for
cracks, distortion, and damaged threads. Make
sure the shutoff valve in the fuel strainer oper-
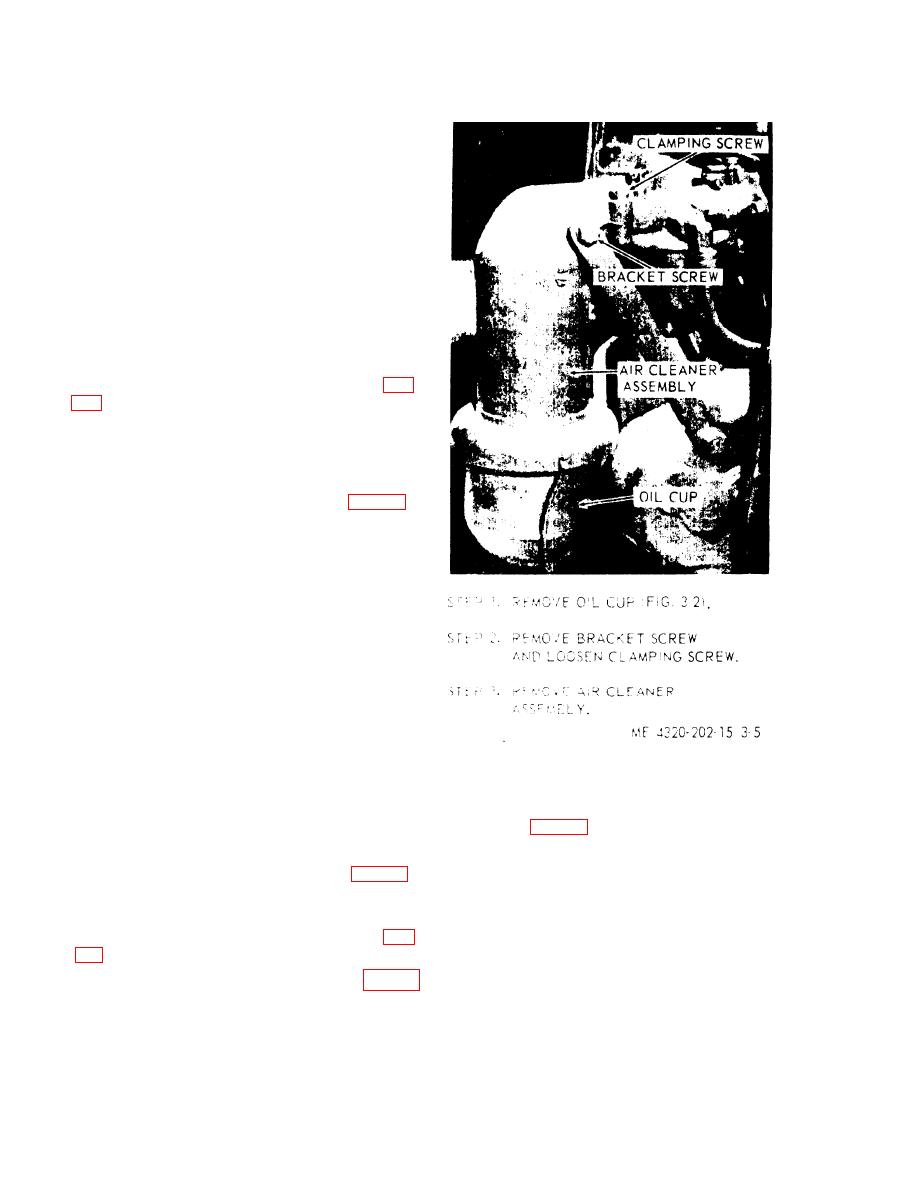
Figure 3-5. Air cleaner removal and installatiom
ates smoothly and easily,
(6) Inspect all other parts for cracks,
c. Disassembly. Disassemble and repair the
worn or damaged threads, or other damage.
carburetor (fig. 39 ).
Replace all damaged parts.
d. Cleaning and Inspection.
c. Installation. Install the fuel tank, bracket,
(1) Clean all parts with approved clean-
fuel strainer, fuel line and fittings (fig. 36).
ing solvent and dry thoroughly with a clean
cloth or low pressure air.
3-28. Carburetor
(2) Inspect the carburetor throttle body
and fuel bowl for cracks, distortion or other
3-7) .
visible damage. Check the operation of the
choke and throttle to make sure they operate
8).
freely without binding.
3-10
|
|
Privacy Statement - Press Release - Copyright Information. - Contact Us |
