|
| |
TM 9-2330-398-24
2-100. ALTERNATOR, MOUNTING BRACKET, AND V-BELT ADJUSTMENT AND REPLACEMENT (continued).
6.
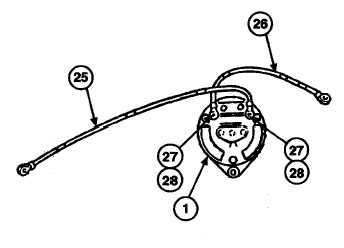
Remove two nuts (27) and lockwashers (28) and positive and negative cables (25 and 26) from rear of alternator
(1). Discard lockwashers.
7.
Remove two screws (2) and self-locking nuts (8), four washers (3), alternator (1), and guard (7) from mounting
bracket (6). Discard self-locking nuts.
8.
Remove three screws (4) and washers (5) and mounting bracket (6) from engine.
9.
Remove shouldered nut (22), pulley (23), and woodruff key (24) from alternator (1).
b. INSTALLATION
1.
Install woodruff key (24) and pulley (23) on alternator (1) and secure with shouldered nut (22).
2.
Install mounting bracket (6) on engine with three screws (4) and washers (5).
3.
Install alternator (1) and guard (7) on mounting bracket (6) with two screws (2), four washers (7), and two new
self-locking nuts (8). Do not tighten screws yet.
4.
Install bracket (3) on engine with two screws (15) and washers (14).
5.
Install adjusting arm (12) on bracket (13) with screw (17), two washers (16 and 11), and new self-locking nut (10).
6.
Install alternator V-belt (9) on pulley (23).
7.
Attach alternator (1) and guard (7) to adjusting arm (12) with screw (18), two washers (19), and new selflocking
nut (21). Raise alternator (1) to put tension on V-belt (9); then hand tighten screw (18).
2-211
|

