|
| |
TM 9-2350-253-34-2
2-90. HAZARDOUS MATERIALS PLACARD AND BRACKET REPLACEMENT.
This task covers:
a.
Removal
b.
Installation
Initial Setup:
Tools/Test Equipment:
Equipment Conditions:
•
General mechanic's tool kit (Item 4, Appendix B)
•
Semitrailer uncoupled (refer to TM 9-2330-398-10).
Material/Parts:
•
Semitrailer bonded and grounded (refer to
•
Self-locking nut (16) (Item 166, Appendix F)
•
Self-locking nut (16) (Item 171, Appendix F)
a.
REMOVAL
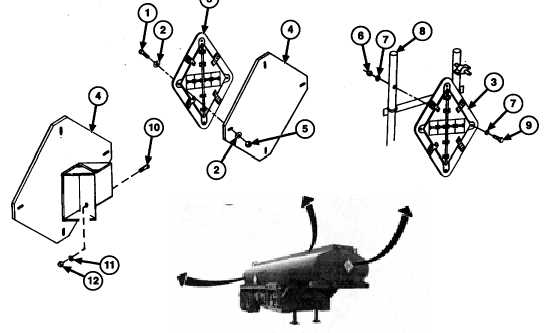
NOTE
All hazardous materials placards are removed and installed from brackets the same
way. One placard is shown here. Brackets are different on rear, curb-side, and
roadside of semitrailer.
1. Remove four screws (1), eight washers (2), four self-locking nuts (5), and hazardous materials placard (3)
from bracket (4). Discard self-locking nuts.
2. Remove four self-locking nuts (6), eight washers (7), four screws (9), and placard (3) from support (8) on front
of semitrailer. Discard self-locking nuts.
3. Remove four screws (10), washers (11), and self-locking nuts (12) and bracket (4) from rear of semitrailer.
Discard self-locking nuts.
2-191
|