|
| |
TM 55-2915-335-30&P
Table 2-2. Maintenance Troubleshooting - Continued
MALFUNCTION
TEST OR INSPECTION
CORRECTIVE ACTION
4. MOTOR RUNS, LOW FLOW AND/OR PRESSURE (Cont)
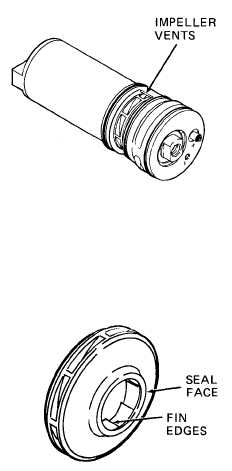
Step 4. Check for clogged impeller. Remove
pump cartridge from housing (paragraph
2-10). Rotate impeller. Look for a buildup of
slime in impeller vents. If no slime buildup is
seen, proceed to Step 5.
If there is slime in the impeller
vents, disassemble and clean
pump components per
paragraphs 2-11 through 2-24.
Step 5. Check impeller and seal face. Remove
field tube, armature, and impeller (paragraphs
2-18 and 2-19). Look for grooved or dull seal
face or worn impeller fins. If impeller and seal
face is good, proceed to Step 6.
Inspect fin edges for damage. If
defective, replace impeller per
instructions and illustrations in
paragraph 2-18. If impeller seal
face looks grooved or dull,
repair per instructions and il-
lustrations in paragraph 2-19.
Step 6. Inlet seal or pump cover packings are
damaged.
Replace preformed packings on
inlet seal and pump cover pack-
ings per instructions and il-
lustrations in paragraph 2-21.
5. PUMP STALLS UNDER LOAD
Step 1. Check for brushes not seating well on commutator. Remove pump cartridge from housing per
paragraph 2-10. Check for shunt lead caught on spring. Inspect brush contact surface for wear and chips or
cracks (secondary brushes paragraph 2-17; primary brushes paragraph 2-20). Check for brush springs out of
place. If brushes, springs and shunt leads are good, proceed to Step 2.
If brush is not seating well on commutator, adjust shunt lead or spring positions, as needed.
Inspect and replace worn, chipped, or cracked brushes per instructions and illustrations in
paragraphs 2-17 and 2-20.
2-14
|

