|
| |
TM 55-2915-335-30&P
Table 2-1. Fault Isolation - Continued
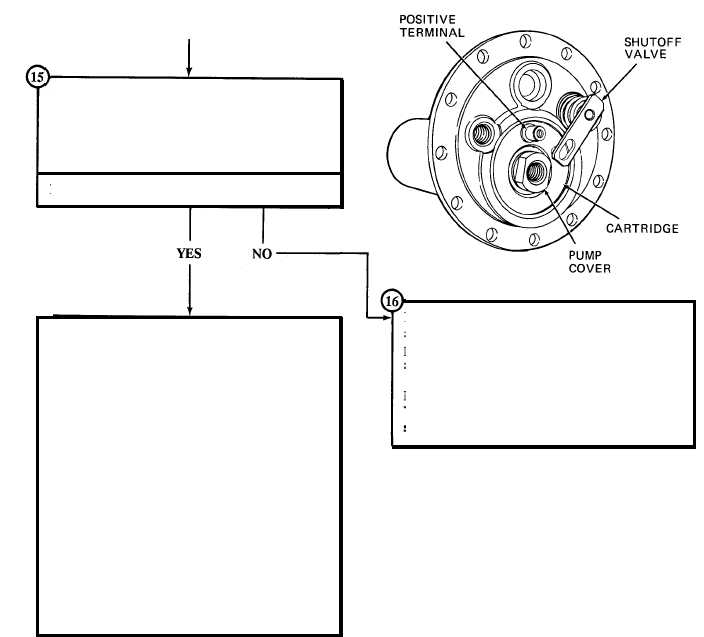
From block 13
l
Check pump or cartridge for leaks.
l
Wipe face of pump assembly dry.
l
Turn pump ON.
l
Check pump face for solvent leaking from
pump.
Does pump face stay dry?
NOTE
Perform the following check only if the complete
pump assembly (housing and cartridge) is being
serviced.
l
Inspect vapor bleed valve and fuel bleed valve
for blockage.
l
Drain calibration fluid from test tank and
pump.
l
Remove pump assembly from test tank.
l
Wipe pump surfaces dry.
l
Inspect vapor bleed valve for blockage per
instructions and illustrations in paragraph
2-12.
l
Inspect canister fuel bleed valve for
blockage per instructions and illustrations
in paragraph 2-11.
Dry wet surfaces, and repeat checks to isolate
source of leak. Check parting surfaces around
positive terminal, pump cover, cartridge, and
shutoff valve.
Proceed to Malfunction Number 8 of Table 2-2.
When source of leak has been located, follow in-
structions in troubleshooting step that applies.
2-6
|