|
| |
TM 5-4320-306-24
4-4. REPAIR INJECTION PUMP (Continued)
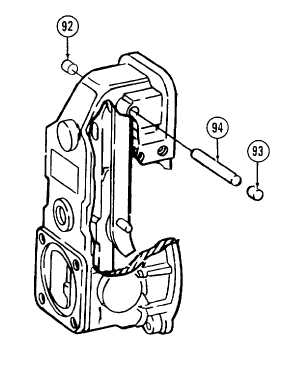
64 Drive out plug (92) by using a hammer and punch on plug (93)
on opposite side
65 Insert punch through hole where plug (92) was removed. Use a
hammer on punch to drive out plug (93) and axle (94).
66 Remove C-clip (95) using screwdriver Remove connecting plate (96).
67 Remove lever arms (97 and 98), bearing support (99), and shims (100) as an assembly by sliding assembly down
and out from under lever (145).
68 Remove C-clip (101) using screwdriver. Remove lever arm (98) from lever arm (97)
69 Press bearing support (99) and shims (100) from lever arm (97).
70 Remove spring (102) using long-nosed pliers to unhook ends.
71 Remove lever arm (103) by sliding up and out from behind lever (145)
72 Remove screw (104) and lockwasher (105).
73 Remove screw plug (106) and washer (107)
74 Remove shutdown lever (108).
75 Remove threaded bushing (109).
76 Remove shim (110) and washer (111).
77 Remove parallel pin (112) and studpin (113)
78 Use a wrench and screwdriver to remove banjo bolt (114) and nut (115).
4-13
|

