|
| |
TM 5-4320-306-24
2-36. REPLACE EXHAUST MANIFOLD AND SUCTION PIPE (Continued)
CLEANING/INSPECTION
1
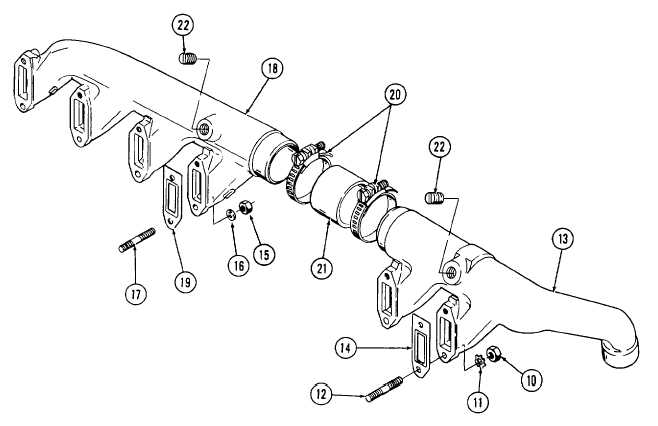
Inspect flanges for cracks, breaks, or damage that would prevent secure mounting
2
Inspect that screw plug (8) and slotted plugs (22) are in place. Replace missing plugs
3
Inspect for damage that would cause leaking of air or exhaust gases.
4
Inspect studs (4, 12, and 17), nuts (2, 10, and 15), and washers (3, 11, and 16) for rust or corrosion and for
thread damage that would prevent secure mounting Replace as required
5
Inspect for loose or missing studs. Tighten or replace as required
6
Inspect compression rings (7) for rust or corrosion and loss of temper Replace as required.
7
Inspect rubber sleeve (21) for brittleness, tears, or leaks Replace worn or leaking sleeve
INSTALLATION
1
Install new mounting studs (12) in the engine block as required.
2
Place new gaskets (14) and the charge air pipe (13) on studs (12), and secure with nuts (10) and toothed washers
(11)
3
Slide rubber sleeve (21) onto the charge air pipe (13) end and slide two hose clips (20) over sleeve (21). Do not
tighten hose clips (20).
4
Place new gaskets (19) on studs (17).
2-128
|