|
| |
TM 5-4320-305-24
2-41. REPLACE/REPAIR FUEL TANK ASSEMBLY (Continued)
4 Clean fuel tank cap and fuel filler screen with diesel fuel oil and dry with compressed air. Inspect for minor rust or
corrosion. Make sure fuel tank cap vent is open. Replace if damaged.
5 Check fuel gage for damage. Replace if damaged.
6 Check pipe plugs, 90 degree elbow, male connector, drain cock, street elbow, and bushings for rust, corrosion,
stripped threads, or other damage. Replace any damaged fittings.
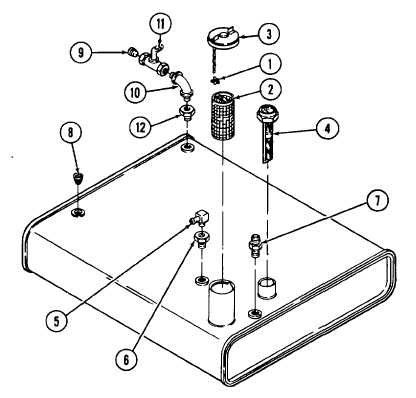
ASSEMBLY:
1 Install street elbow (10), drain cock (11), and bushing (12).
2 Install plugs (8 and 9).
3 Install male connector (7).
4 Install 90 degree elbow (5) and bushing (6).
5 Install fuel gage (4).
6 Engage connector clip (1) into fuel filler screen (2) and install. Be sure fuel tank cap vent is in open position.
2-153
|