 |
|||
|
|
|||
|
|
|||
| ||||||||||
|
|
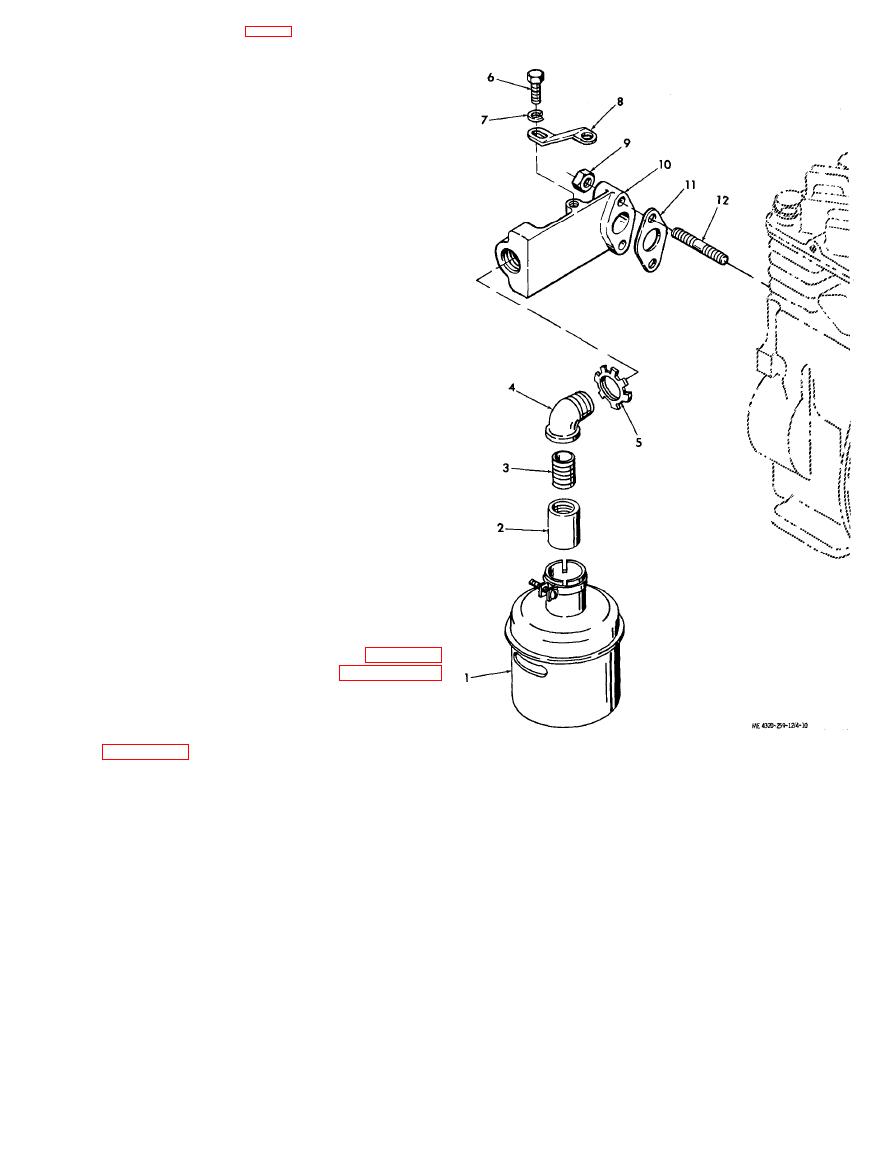 KEY to fig. 4-9:
1.
Wing nut
2.
Washer
3.
Filter element
4.
Decal
5.
Mounting washer
6.
Oil cup
7.
Stud
8.
Nut
9.
Lock washer
10.
Flat washer
11.
Elbow
12.
Screw
13.
Lock washer
14.
Gasket
15.
Brace
16.
Screw
b. Cleaning and Inspection.
(1) Discard and replace the gaskets.
(2) Agitate the air cleaner element in a clean
container of approved cleaning solvent; shake out
excessive solvent.
(3) Clean all remaining parts with cleaning
solvent; dry thoroughly.
(4) Inspect the air cleaner filter element for
clogging, dents, deterioration, rusting, and other
damage; replace a damaged filter element.
(5) Inspect the air cleaner cup for cracks,
dents, and distortion; replace a damaged oil cup.
( 6 ) Inspect the stud for bends and for
damaged threads; replace a damaged stud.
( 7 ) Inspect all other parts for cracks,
distortion, and other damage; replace damaged
parts.
c. Reassembly and Installation. Reassemble
and install the air cleaner as shown in figure 4-9.
Service the air cleaner as directed in paragraph 3-9.
4-24. Exhaust Muffler
a. Removal and Disassembly. Remove and
disassemble the muffler and related parts as shown
in figure 4-10.
1.
2.
Pipe coupling
3.
Pipe nipple
4.
Pipe elbow
5.
Lock nut
6.
Cap screw
7.
Lock washer
8.
Brace
9.
Nut
10.
Exhaust elbow
11.
Gasket
12.
Stud
view.
|
|
Privacy Statement - Press Release - Copyright Information. - Contact Us |
