 |
|||
|
|
|||
|
|
|||
| ||||||||||
|
|
 5.
Pin
10.
Bottom case
1.
Nut (2)
11.
Bolt (4)
2.
Bolt (19)
6.
Upper case
7.
Gasket
12.
Roll pin
3.
Setscrew (2)
13.
Shims (as required)
4.
Nut
8.
Stud (2)
9.
Plug
Figure 6-3-Continued.
g. Adjust the splash collar and mechanical seal
during the installation of the rotating element assembly in
sequence shown by key numbers in figure 6-9.
6-7. Bottom Case
a. Remove and install the pump coupling and
rotating element assemblies as directed in paragraphs 6-5
and 6-6, above.
b. Remove and install the bottom case and shims as
shown in figure -3.
c. Clean, inspect, and repair.
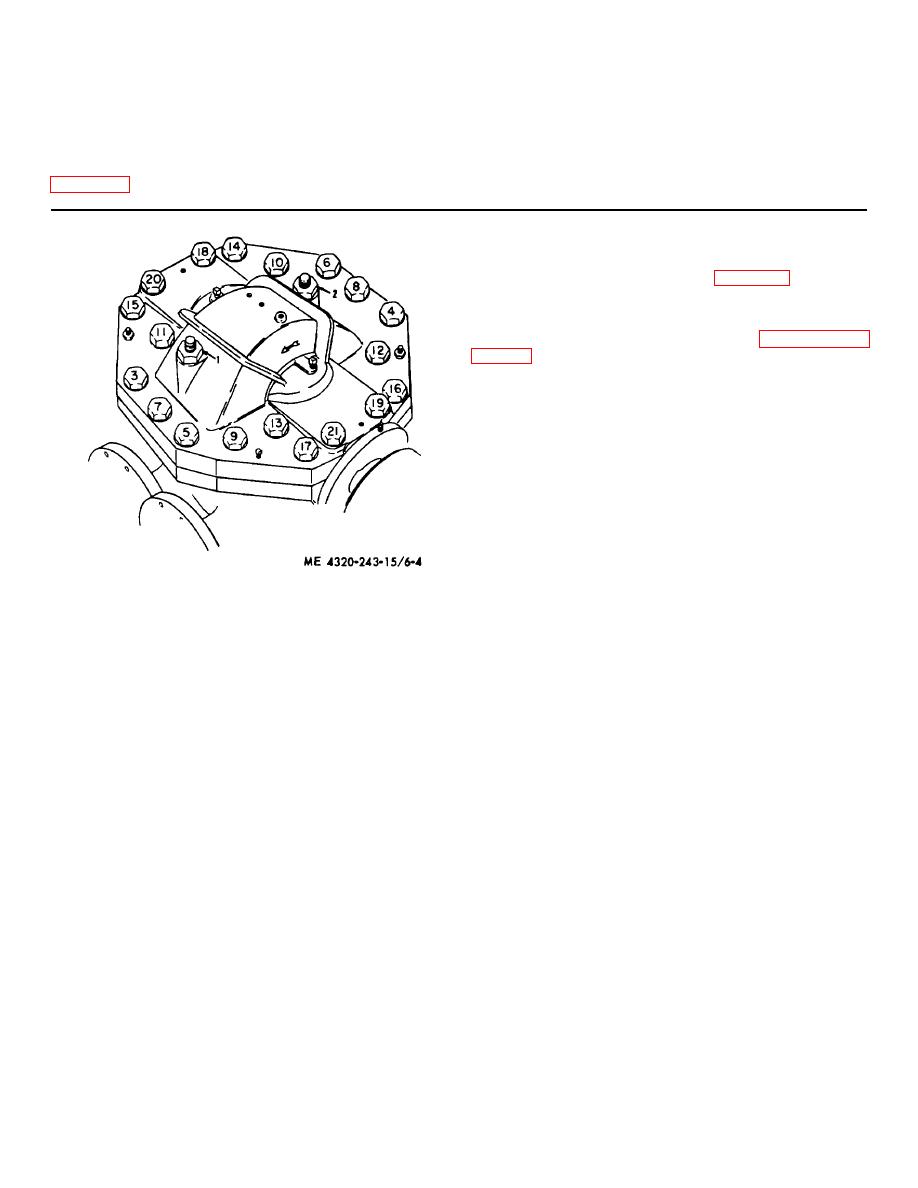
Figure 6-4.
Upper case, nut and screw tightening
sequence.
6-5
|
|
Privacy Statement - Press Release - Copyright Information. - Contact Us |