 |
|||
|
|
|||
|
|
|||
| ||||||||||
|
|
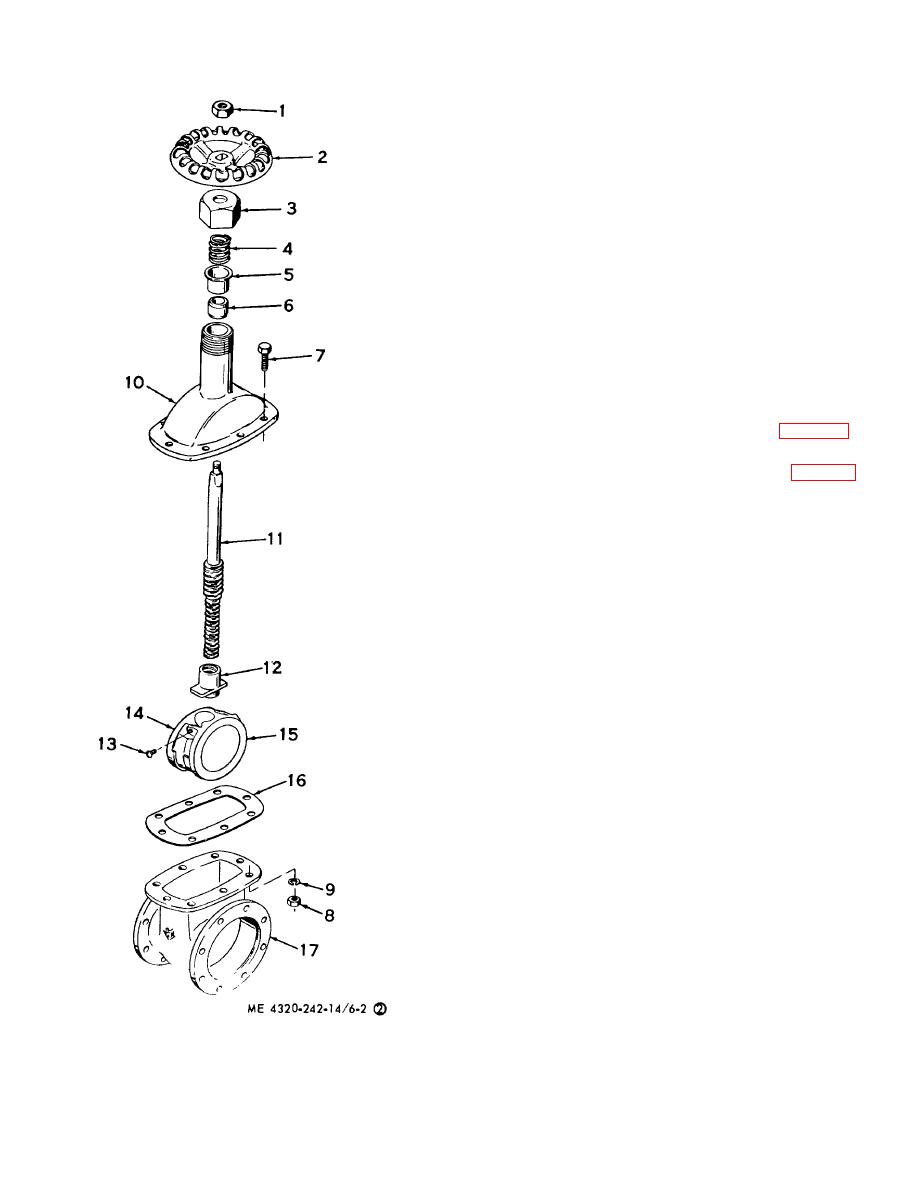 1.
Nut, handwheel
2.
Handwheel
3.
Nut, packing
4.
Spring, gland
5.
Gland, packing
6.
Packing
7.
Capscrew
8.
Nut
9.
Washer, lock
10.
Bonnet
11.
Stem
12.
Pullnut
13.
Machine, screw
14.
Disc, half
15.
Disc, half
16.
Gasket
17.
Body
6-6. Discharge Check Valve
a. General. The discharge check valve is spring
loaded in the open position. It must be closed manually.
c. Disassembly.
(1) Remove the capscrews (21, fig. 6-3),
lockwashers (20), flat washers (19), and sleeves (18).
Disconnect the spring (22) from the handle (17).
(2) Remove the capscrews (24 and 25),
lockwashers (20), flat washer (19), and remove the
bracket (26).
(3) Unscrew the setscrew (23) and remove
the handle (17) from the shaft (15). Remove the key
(16).
(4) Remove the packing nut (13) and packing
(12) from the check valve body (8).
(5) Unscrew the setscrew (4) and slide the
weight arm (5) on the shaft far enough to remove the
key (14). Remove the key and pull out the shaft (15);
remove the weight arm (5) and valve weight (3) from the
check valve body (8).
(6) Remove the cotter pin (7), slotted nut (2),
and shoulder screw (6). Remove the weight (3) from the
weight arm (5).
(7) Remove the plugs (9 and 10) from the
check valve body (8).
d. Cleaning and Inspection.
(1) Wash all parts with cleaning solvent and
dry thoroughly with compressed air or a clean cloth.
(2) Inspect the shaft for wear and damage.
Replace a defective shaft.
(3) Inspect the check valve body for cracks
and breaks; replace if necessary.
(4) Inspect all mounting and assembly screws
and studs for stripped or damaged threads. Replace
damaged screws or studs as necessary.
Figure 6-2. Suction and discharge gate valves, 4 in.
(5) Replace a broken or cracked spring.
exploded view. Serial numbers 419501 through
(6) Discard the gaskets; use new gaskets for
419959. (Sheet 2 of 2)
reassembly and installation.
6-6
|
|
Privacy Statement - Press Release - Copyright Information. - Contact Us |
