 |
|||
|
|
|||
|
|
|||
| ||||||||||
|
|
 TM 5-4320-234-34
Table 2-1. Troubleshooting - Continued
MALFUNCTION
TEST OR INSPECTION
CORRECTIVE ACTION
ENGINE CONTINUED
1.
Screws
5.
Lockwasher
11.
Gasket plate
2.
Lockwasher
7.
Flatwasher
12.
Gasket
3.
Cover
8.
Ground lead
13.
Magneto
4.
Gasket
9.
Bolt
14.
Gasket
5.
Screw
10.
Flatwasher
15.
Spacer
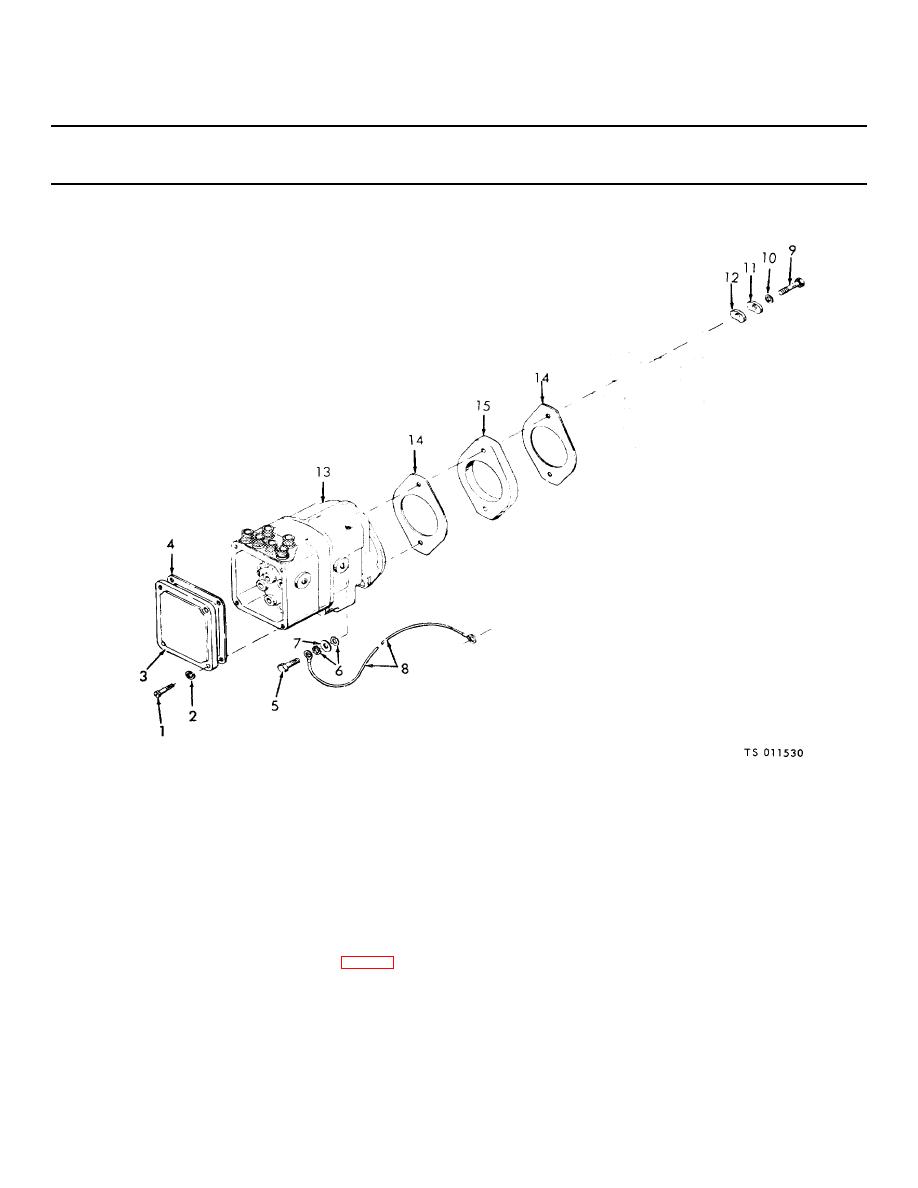
Figure 2-9. Magneto removal.
(6) Disconnect the shielded spark plug cables from the magneto end cap by unscrewing the shield connectors. Disconnect
the ends of the leads from the distributor cap in the magneto end cap.
(7) Remove the lower screw (5), lockwashers (6), and flatwasher (7) that secure the bottom of the magneto and ground lead
(8) to the engine front end plate. Remove bolt (9), flatwasher (10), gasket plate (11), and gasket (12) that secure the top
of the magneto and governor to the gear cover; remove magneto (13), gaskets (14) and spacer (15).
(8) Remove screw (1, fig. 2-10). governor (2) and gasket (3).
2-12
|
|
Privacy Statement - Press Release - Copyright Information. - Contact Us |