|
| |
TM 10-5430-242-12&P
0005 00
Change 1
0005 00-8
5. Transport tank (1) to the center of the desired installation site. Position long side of tank (1) parallel
with long side of the installation site.
6. Unfold one-half of tank (1) along the length of the installation site, and unfold the other half of tank (1)
in the opposite direction along the length of the installation site.
NOTE
Repair items (sealing clamps, plugs, gaskets, and preformed packing) are packaged in
another box and should be placed in a secure storage area until needed.
7. Grasp the handles located along the length of tank (1), and pull the folded sides of tank (1) toward the
sides of the installation site.
8. Smooth out all creases and wrinkles in tank (1) fabric.
9. Remove 4-inch filler/discharge valve, 2-inch drain ball valves, and vent assembly from the cushioning
bags. Remove cushioning bags from the ends of all hoses. Save all cushioning bags and packing
material for reuse when tank is put back into storage.
Removal of Drain Assembly Plug and Installation of Drain Hose Assembly
WARNING
When filling the tank with fuel, verify that the drain ball valve handle is rotated fully
to the right (closed position), before fuel is introduced into the tank. Unobserved
drainage of fuel can result in an explosion or fire. Failure to comply with this
warning can cause death or severe personal injury.
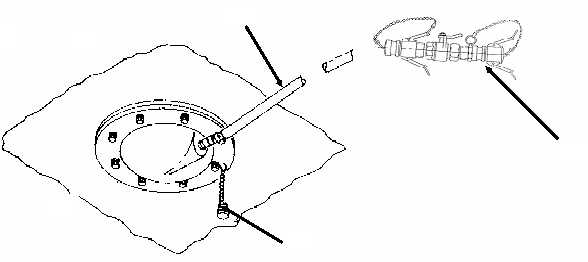
1. Fold the tank to expose drain plug (1).
2. Remove drain plug (1).
3. Apply anti-seize tape (Item 1, WP 0042 00) to the threaded end of drain hose (2).
1
2
3
|