|
| |
TM 10-4930-248-13&P
4.10B.
REPAIR UNISEX COUPLING-continued
2
5
4
7
10
11
6
C
8
12
13
9
3
4
NOTE
Do not remove continuity
ball (12) from unisex coupling body. If continuity
ball requires replacement,
the entire unisex coupling must be replaced.
b. Assembly.
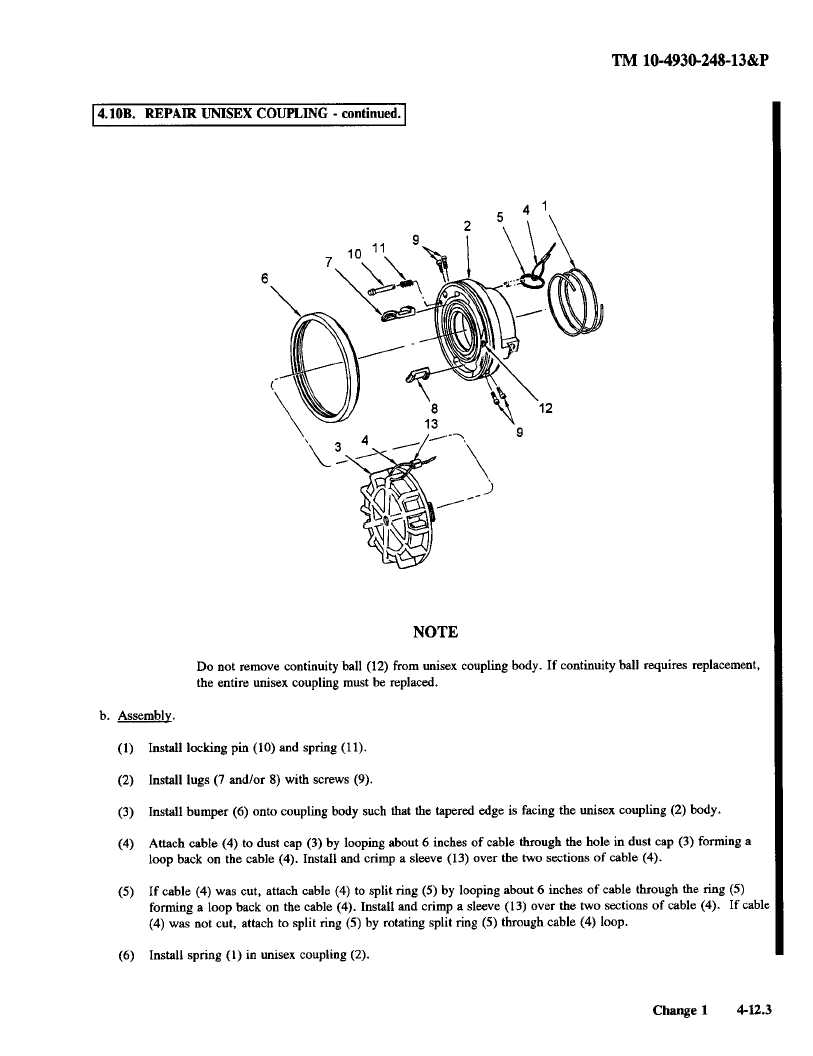
(1) Install locking pin (10) and spring (11).
(2) Install lugs Q and/or 8) with screws (9).
(3)
Install bumper (6) onto coupling body such that the tapered edge is facing the unisex coupling (2) body.
(4)
Attach cable (4) to dust cap (3) by looping about 6 inches of cable through the hole in dust cap (3) forming a
loop back on the cable (4). Install and crimp a sleeve (13) over the two sections of cable (4).
(5)
If cable (4) was cut, attach cable (4) to split ring (5) by looping about 6 inches of cable through the ring (5)
forming a loop back on the cable (4). Install and crimp a sleeve (13) over the two sections of cable (4). If cable
(4) was not cut, attach to split ring (5) by rotating split ring (5) through cable (4) loop.
(6) Install spring (1) in unisex coupling (2).
Change
1
4-12.3
|

