 |
|||
|
|
|||
|
Page Title:
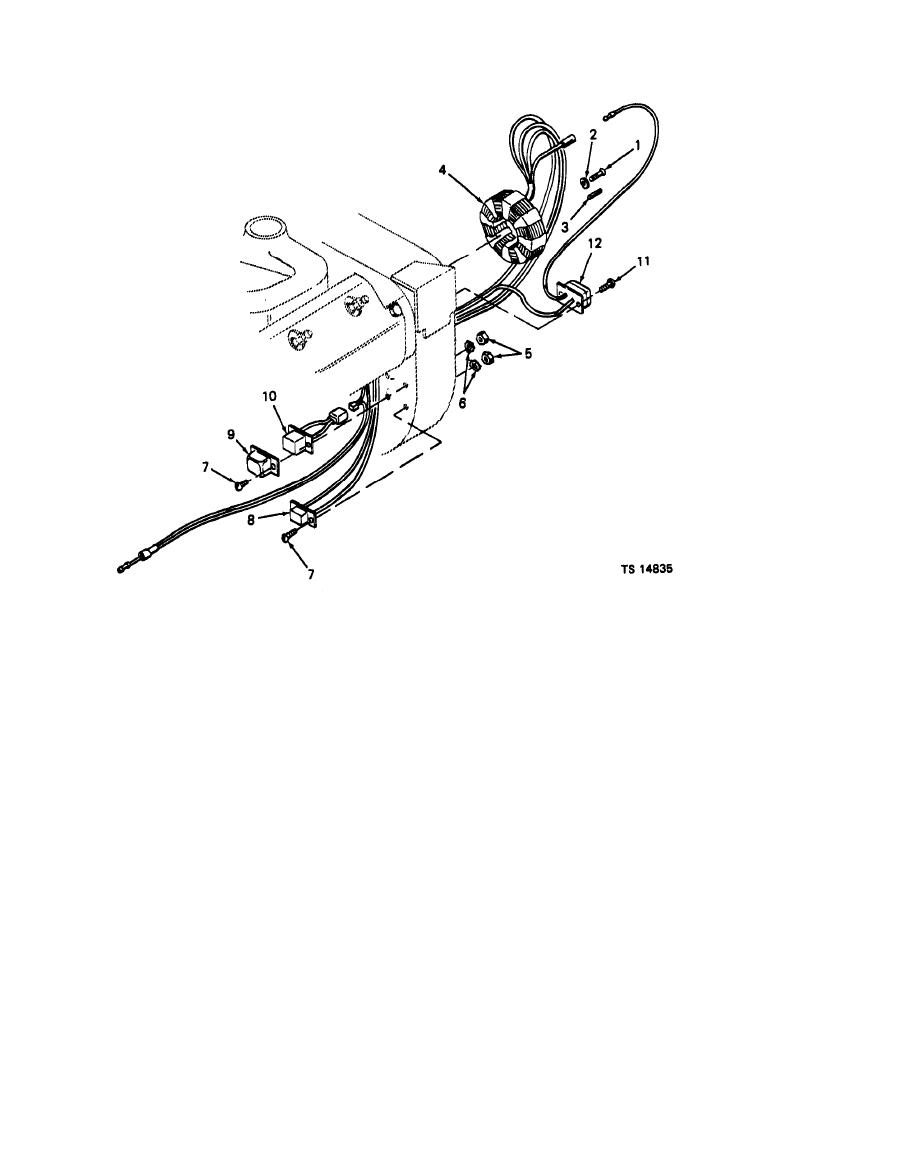
Figure 6-13. Flywheel alternator. |
|
||
| ||||||||||
|
|
 TM 5-4320-273-14
1. Screw
7. Screw
2. Lockwasher
8. Rectifier module
3. Pin
9. Regulator module shield
4. Stator assembly
10. Regulator module
5. Nut
11. Screw
6. Lockwasher
12. Isolation diode
c. Cleaning and Inspection.
magnetism,
d. Installation.
WARNING
(1) Install isolation diode (12) using screws (11).
DRY CLEANING SOLVENT, P-D-680
(2) Be sure mounting surfaces of modules and
or P-S 661, wed to clean parte is
engine are clean. Hold regulator module (10),
potentially dangerous to personnel
regulator module shield (9), and rectifier module (8)
and property. Avoid repeated and
in place and secure with screws (7), lockwashers (6),
prolonged skin contact. DO NOT use
and nuts (5),
near open flame or excessive heat.
(8) Install stator assembly (4) to flywheel shroud
Flash point of solvent is 100 to 138F
and engine gear cover by installing pins (3), lock-
(38 to 60C).
washer (2), and screw (l).
(1) Clean metal parts with cleaning solvent (fed,
(4) Install the Woodruff key (5, fig, 6-4) in the
spec, P-D-680); dry thoroughly. Clean all nonmetallic
crankshaft keyway. Position the flywheel (4) on the
parts with a cloth dampened lightly with cleaning
crankshaft so that the keyway aligns with the
solvent, Take care to prevent saturating the stator
Woodruff key in the shaft keyway. Tap the flywheel
coils when you clean these parts.
onto the shaft with a soft hammer.
(2) Inspect leads for frayed wires or loose con-
(5) Secure the flywheel to the crankshaft with
nections; replace all damaged leads.
nut (2) and lockwasher (3).
(8) Inspect the stator assembly (4) for damaged
(6) Drive in hand crank pin (1) so that ends
insulation, gouges, or other damage. Replace a
protrude evenly.
damaged stator.
(7) Replace the flywheel screen (3, fig, 6-3) with
(4) Inspect inserts in flywheel for loSS of
screws (1) and lockwashers (2).
|
|
Privacy Statement - Press Release - Copyright Information. - Contact Us |
