 |
|||
|
|
|||
|
|
|||
| ||||||||||
|
|
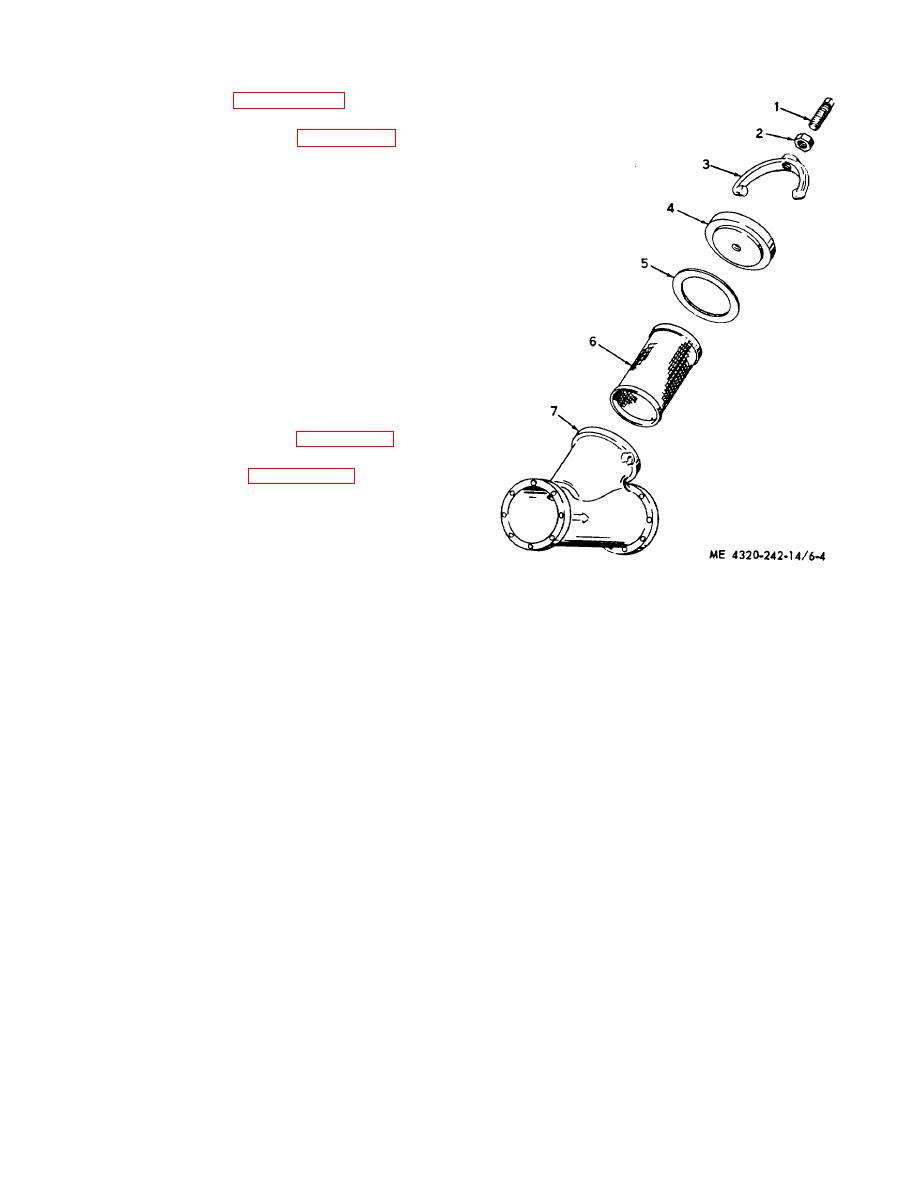 6-7. Suction Strainer Assembly
the suction strainer assembly.
b. Disassembly.
Refer to figure 6-4 and
disassemble the suction strainer.
c. Cleaning and Inspection.
(1) Wash all parts with cleaning solvent, dry
thoroughly.
(2) Inspect the cover (1) and body (7) for
cracks, distortion, dents, and other damage; replace
damaged parts.
(3) Inspect the screen (6) for tears, holes,
distortion, and clogging; replace damaged screen.
(4) Inspect the yoke for cracks, misalignment,
and damaged threads; replace damaged yoke.
(5) Inspect
gasket
for
damage
and
deterioration; replace damaged gasket.
(6) Inspect the screw and nut (7) for cracks
and for damaged threads; replace damaged parts.
d. Reassembly.
Refer to figure 6-4 and
reassemble the suction screen assembly.
the suction screen assembly.
1.
Setscrew
2.
Jam, nut
3.
Yoke
4.
Cover
5.
Gasket
6.
Screen
7.
Body
Figure 6-4. Suction strainer, 4 inch; exploded view
(Serial numbers 419501 through 419959).
6-8
|
|
Privacy Statement - Press Release - Copyright Information. - Contact Us |
