|
| |
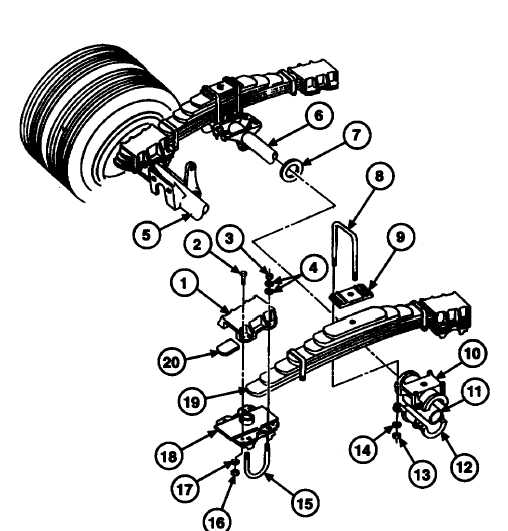
TM 9-2330-398-24
3-11. LEAF SPRING ASSEMBLY REPLACEMENT (continued).
3.
Remove two U-bolts (8), wear plate (9), and lower trunnion hub (12) from leaf spring assembly (19) and trunnion
tube (6).
4.
Remove four nuts (16), washers (17), and screws (2) from spring end cap (1) and spring seat (18) on axle (21).
5.
Remove four self-locking nuts (3), eight washers (4), two U-bolts (15), spring end cap (1), end cap cushioning pad
(20) and spring seat (18) on axle (5). Discard self-locking nuts.
6.
Repeat steps 4 and 5 for remaining spring end cap (18).
7.
Using lifting device, remove leaf spring assembly (19) from upper trunnion hub (10).
8.
Remove upper trunnion hub (10), rubber bushing (11), and trunnion washer (7) from trunnion tube (6).
3-36
|