|
| |
TM 5-4320-306-24
4-12.
REPLACE/REPAIR CRANKSHAFT ASSEMBLY (Cont inued)
2
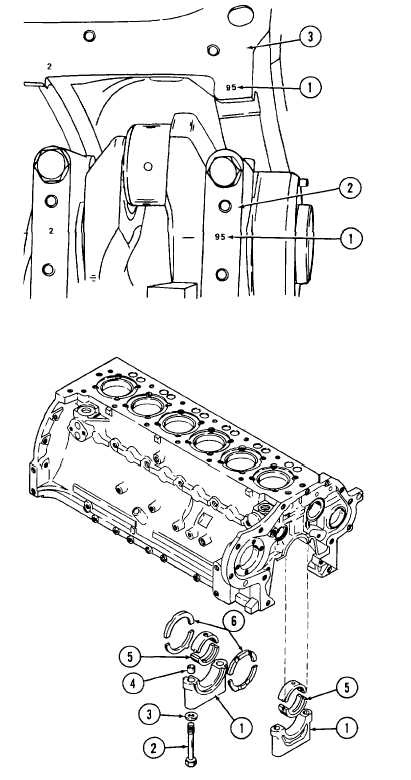
Check the matchmark (1) on each
bearing cap (2) and match it with the
corresponding matchmark (1) on the
crankcase
(3).
The
matchmarks
indicate direction of installation as
well as location. The number and
direction of the matchmark on each
bearing cap shall be the same as the
matchmark
at
each
crankcase
position.
3
In each bearing cap (1), install bolts
(2), washers (3) and dowel bushings
(4).
4
Coat
main
bearings
(5)
with
lubricating oil.
5
Coat stop rings (6) with grease and
position on bearing caps so that
each stop ring lines up with groove
on stop ring face of bearing cap. Be
sure to install the two stop rings on
the bearing caps from which they
were removed.
6
Starting with the center locating
bearing and working toward the front
and rear bearings, install correctly
matched main bearings (5), bearing
caps (1), and stop rings (6) in the
corresponding bearing brackets of
the crankcase.
7
Make sure main bearing half (5) with
oil
groove
is
installed
in
the
crankcase, and that each bearing
cap (1) is properly alined by dowel
bushings (4).
8
Tighten bolts (2) alternately and
evenly to 22.13 ft-lb (30 N.m) torque
with socket wrench. Using torque
gage No. 101910, tighten bolts an
additional 60 degrees. Following the
same pattern, tighten bolts again an
additional 45 degrees.
4-101
|