|
| |
TM 5-4320-306-24
3-22. REPLACE/REPAIR FRONT COVER (Continued)
INSTALLATION:
1.
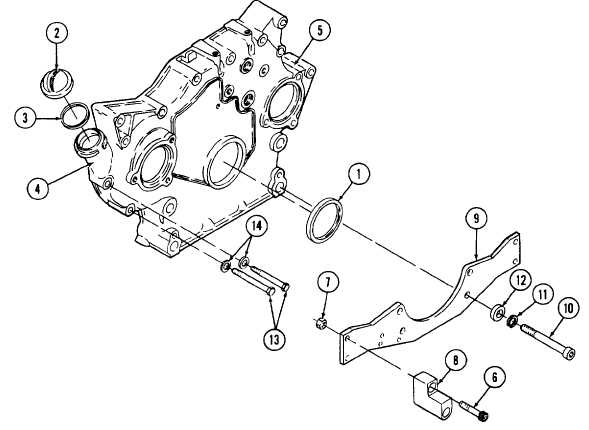
Coat sealing surface of the front cover (5) and crankcase with sealing compound.
2.
Position front cover (5) on crankcase so mounting holes aline with mating holes In crankcase.
3.
Install bolts (13) and washers (14) Tighten alternately and evenly until all are tightened securely.
4.
Wipe excess sealant from crankcase and front cover.
5.
Secure support bracket (9) to front cover (5) using screws (10), lockwashers (11), and washers (12).
6.
Secure engine supports (8) to support bracket (9) using bolts (6) and nuts (7).
7.
Apply lubricating oil to lip of new shaft seal (1).
8.
Place shaft seal (1) m seat of crankshaft bore, and Install crankshaft seal assembly tool No. 142520 (12).
9.
Press shaft seal (1) into front cover (5).
10.
Install assembled oil filler cap (2) and washer (3) onto oil filler neck (4) of front cover (5).
11.
Remove blocking from the skid. Do not allow the blocking to damage unit components during removal.
3-122
|

