|
| |
TM 5-4320-305-10
3-7.
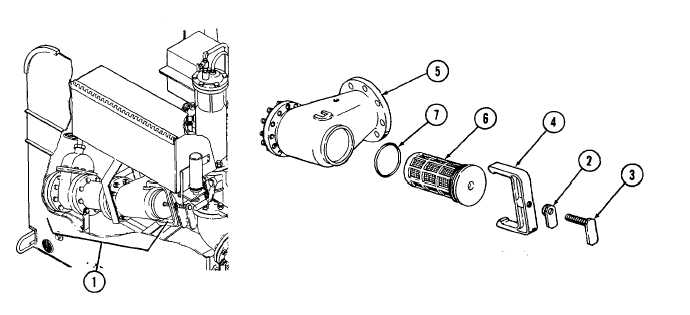
CLEANING/INSPECTING/REPLACING SUCTION ASSEMBLY
1
Clean dirt from exterior of suction assembly (1) using a clean, dry cloth.
2
Unlock locking lever (2) and remove lever bolt (3).
3
Remove strainer clamp (4) from strainer body (5).
4
Remove strainer assembly (6) from strainer body and examine strainer assembly for debris and tears.
5
Remove any debris found in strainer assembly.
6
Discard damaged strainer assembly and replace with new strainer assembly.
7
Place strainer assembly in strainer body.
8
Check that preformed packing (7) and sealing surfaces of strainer body seat properly to prevent leaks.
9
Install strainer clamp (4) on strainer body (5) with locking lever (2) and lever bolt (3).
10 Tighten lever bolt and locking lever.
3-15
|