|
| |
TM 10-5430-232-12&P
(b.) The size of hole or tear will determine the size of wood plug to be used.
1 For holes (tears) up to approximately 0.5 inch (1,27 cm) in size, use the 3- inch (7.62 cm) long
plug.
2 For holes (tears) up to approximately 1.5 inch (3.81 cm) in size, use the 5- inch (12.7 cm) long
plug.
(c.) Select the size plug needed to fit (seal) the tank puncture, wet and insert in the hole. Twist
plug clockwise (to the right) until the leak is either stopped or slowed. Follow-up regular
inspection should be made of the wood plugs, as possible tightening may be necessary if the
leaks resume. Later, if a leak is not totally stopped, the use of a small sealing clamp may
become necessary.
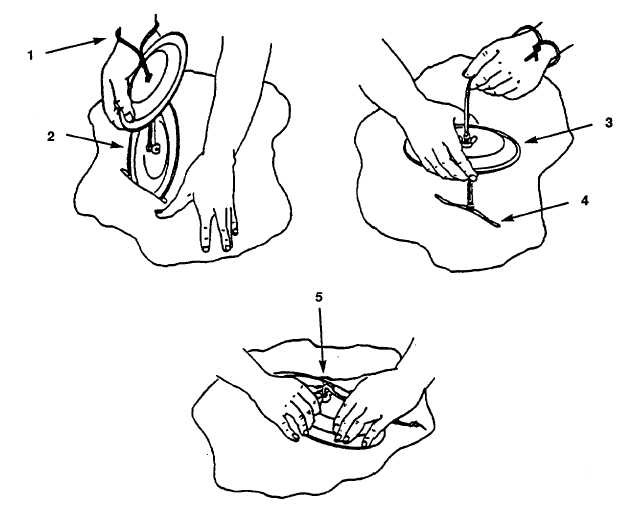
(3) Emergency repairs with sealing clamps (refer to figure 2-3)
a. Small slits, tears, or cuts (not to exceed 6 inches (15.24 cm) in length) may be repaired with sealing
clamps.
Figure 2-3. Installation of sealing clamps.
2-15
|

