|
| |
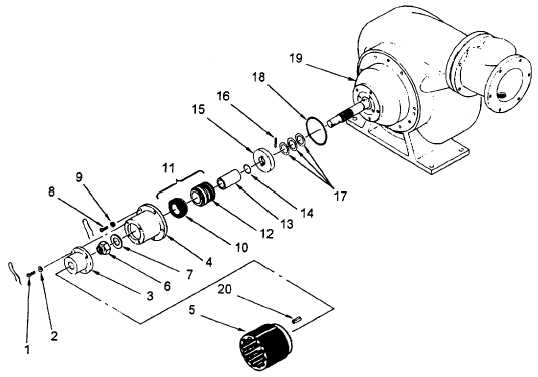
TM 10-4320-351-14
Figure 5-4. Shaft Seal Assembly/O-Ring Replacement
(7)
Remove the shaft nut (6) and flat washer (7).
(8)
Remove safety wire from seal housing screws (8).
(9)
Remove the five seal housing screws (8) and flat washers (9); remove the shaft seal housing.
NOTE
The stationary seal portion of the rotating shaft seal will remain in the shaft seal
housing and must be pushed out.
(10)
Remove the stationary seal portion (10) of the rotating shaft seal (11) from the shaft seal housing (4).
Discard the seal (10).
NOTE
Note installation direction of rotating spring portion of shaft seal for reassembly.
(11)
Remove spring (12) and spacer (13) as a unit.
(12)
Press spring (12) off spacer (13) and discard spring (12).
(13)
Remove and discard shaft O-ring (14). Do not remove other shaft components (thrust washer [15],
dowel [16] and shims [17]) unless replacement is necessary.
5-10
|