|
| |
TM 10-4320-348-14
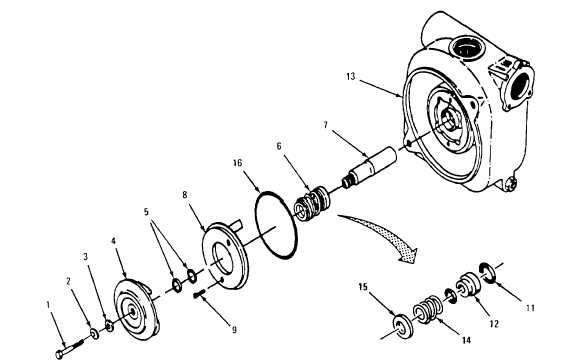
Figure 5-3. Replacing impeller, Shaft Seal, and Shaft Adapter
Refer to Figure 5-3.
(6)Remove impeller locking bolt (1) flat washers (2) and teflon washer (3).
(7)Unscrew impeller (4) in a counterclockwise direction.
NOTE
It may be necessary to use a small wood block and rubber mallet to tap the impeller vanes so
impeller breaks loose.
(8)Remove shims (5) and spring and spring seat [part of seal assembly (6); the seal will remain in the shaft adapter
(7)].
(9)Remove wear plate (8) by removing two screws (9). Remove and discard O-ring (10).
(10)Remove shaft adapter (7) and seal (6); discard shaft seal.
b. Inspection/Repair.
(1)Carefully inspect the gasket and check valve. If either is damaged, replace it. If not, thoroughly clean and wipe dry
with lint-free cloth.
(2)Inspect studs. If damaged, remove and replace.
(3)Carefully inspect all parts for signs of wear and corrosion.
(4)Inspect volute cover for foreign matter obstructing flow passages.
5-6
|