|
| |
TM 9-2330-398-24
4-1.
ENGINE ASSEMBLY REPAIR (continued).
NOTE
• If piston assembly cannot be removed, turn crankshaft to align connecting rod with
crankshaft.
• Do not set cylinder block assembly upright until after removal of oil pump pick-up cup
assembly, camshaft, and valve tappets.
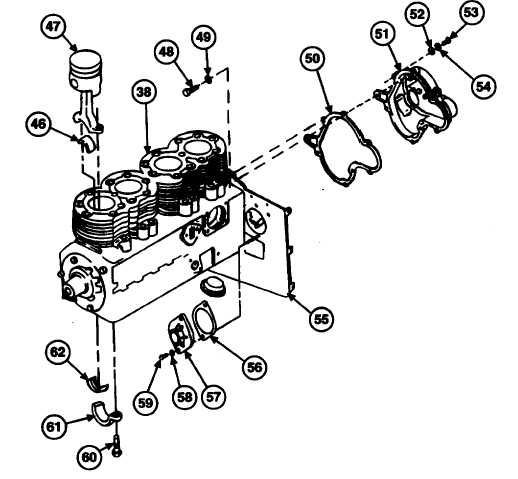
12. Remove two bolts (60), cap (61), and two half bearings (46 and 62) from each of four piston assemblies (47).
Push piston assemblies (47) upward through top of cylinder bore in cylinder block (38). Loosely install cap (61)
and half bearings (46 and 62) on corresponding removed piston assemblies (47) to maintain proper grouping.
13. Remove two screws (59) and lockwashers (58), cover (57), and gasket (56) from backplate (55). Discard
lockwashers and gasket.
14. Remove screw (48) and lockwasher (49) from backplate (55). Discard lockwasher.
NOTE
Tap crankcase gear cover with hammer to loosen gear cover for easy removal.
15. Remove four screws (54), lockwashers (53), and washers (51) from crankcase gear cover (50). Remove gear
cover (51) and gasket (50) from backplate (55). Discard lockwashers and gasket.
4-6
|