|
| |
TM 9-2330-398-24
3-41. EMERGENCY VALVE REPAIR.
This Task Covers:
a. Removal
b. Disassembly
c. Cleaning and Inspection
d. Assembly
e. Installation
Initial Setup:
Tools/Test Equipment:
• Seal (Item 153, Appendix F)
• General mechanic's tool kit (Item 4, Appendix B)
Equipment Conditions:
Materials/parts:
• Semitrailer uncoupled (refer to TM 9-2330-398-10).
• Drycleaning solvent (Item 12, Appendix C)
• Semitrailer bonded and grounded (refer to
• Rag (Item 25, Appendix C)
TM 9-2330-398-10).
• O-ring (Item 123, Appendix F)
• Semitrailer tank drained and purged (refer to
• Preformed packing (2) (Item 137, Appendix F)
TM 9-2330-398-10).
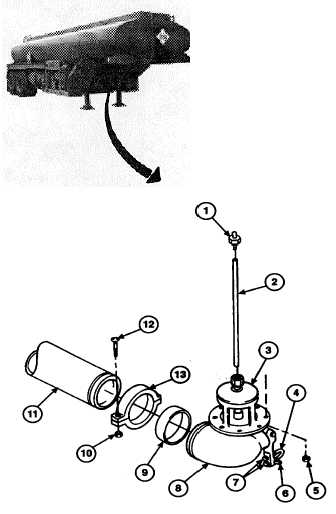
a. REMOVAL
1. Loosen two nuts (7) on emergency valve lever
U-bolt (4), and disconnect emergency valve
cable (6) from emergency valve (3).
CAUTION
To avoid equipment
damage, support large
outlet tube with jack
stands
or
blocks
before removal.
2. Remove two bolts (12) and nuts (10), seal (9),
and coupling (13) from emergency valve (3) and
outlet pipe (11). Discard seal.
3. Remove eight nuts (5), emergency valve (3),
pipe (2), and adapter (1) from tank sump (8).
3-120
|