|
| |
TM 5-4320-306-24
3-11. REPLACE/REPAIR OIL PUMP ASSEMBLY (Continued)
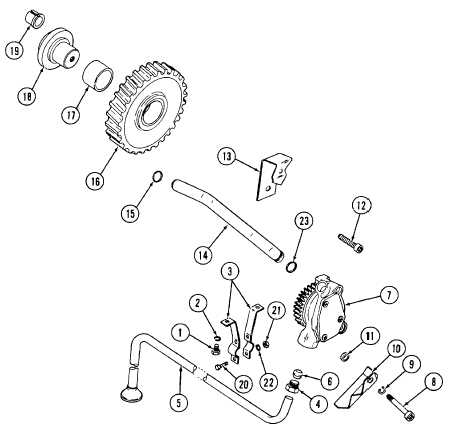
5 If yoke spring (13), shield (10), or pipe clips (3) are bent, reshape to approximate the original
functional shape. If the component cannot be restored to a functional configuration, or if the
mounting holes are elongated or torn, replace the component.
6 Buff a scratched or pitted journal (18) surface with emery cloth. If the pitting or scratches are
too deep to remove with fine emery cloth, the journal must be replaced.
7 Smooth chips or burrs from the bushing contacting hole of the journal with a fine file. If the
chips or burrs cannot be smoothed with a fine file, replace the journal.
8 A sheared or damaged bushing cannot be repaired; replace with new bushing.
9 Minor chips or pitting of idler gear (16) teeth can be smoothed with a fine file and crocus cloth
If the chips or pitting cannot be smoothed, the gear must be replaced
10 If the vertical clearance of the gear bushing exceeds 1.576 inches (40.030 mm), press the
damaged bushing from the gear and press in a new bushing.
3-55
|

