|
| |
TM 5-4320-305-24
4-10. REPLACE/REPAIR PISTON ASSEMBLY (Continued)
INSTALLATION:
CAUTION
L ring breakage may occur if rings are opened more than Piston ring breakage may occur if rings
are opened more than necessary when removing or installing them. Do not strain rings.
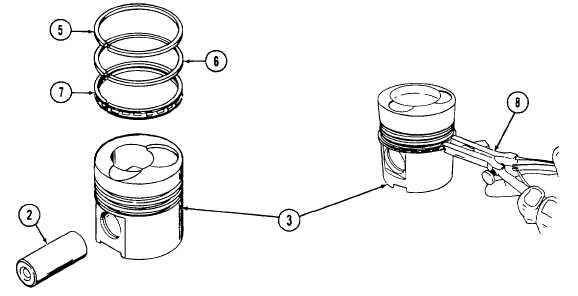
1
Install new piston rings (7, 6, and 5) with piston ring pliers No. 130300 (8). Install rings in the order listed, starting
with the oil control ring (7). Be careful not to strain rings by opening them too wide during installation. Make sure
that the piston ring gaps are equally spaced around the piston 120 degrees from each other.
2
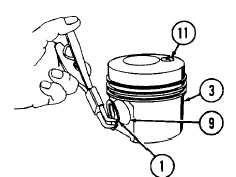
Install new circlip (1) in lip groove of piston pin bore (9) opposite arrow (11) marked on the top of the piston (3), and
pointing to the left as circlip is installed.
4-80
|