|
| |
TM 5-4320-305-24
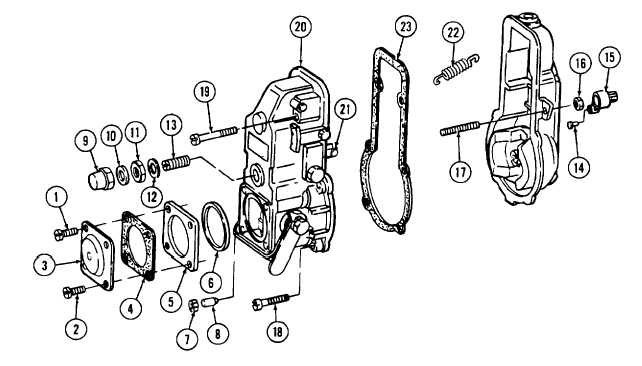
4-4. REPAIR INJECTION PUMP (Continued)
78 Position the number of shims selected in step 77 onto lever arm (97).
79 Press bearing support (99) onto lever arm (97) using arbor press.
80 Slide lever arm (103) behind lever (145) working from the top of governor cover (20).
81 Install spring (102) onto lever arm (103) and lever (145) using a long-nosed pliers.
82 Place lever arm (98) onto lever arm (97) and install C-clip (101).
83 Slide assembled lever arms (98 and 97) under lever (145), working from the bottom of governor cover (20).
84 Place connecting plate (96) onto lever arm (98) and install C-clip (95).
85 Using a punch and hammer, drive axle (94) through governor cover (20) and lever arms (97 and 103).
86 Using hammer and punch, install two plugs (92 and 93).
87 Install adjusting screw (17) and nut (16).
88 Install cap (15) and lead seal (14).
89 Install spring (22) onto retaining plate (30).
90 Apply thin coat of sealing compound to gasket (23) and place on housing (51).
91 Position governor cover (20) near housing (51).
92 Connect rack link (21) to injection pump rod (64) and squeeze together ends of rack link to secure connections.
4-35
|