|
| |
TM 5-4320-305-24
2-28. REPLACE/REPAIR EXHAUST SYSTEM(Continued)
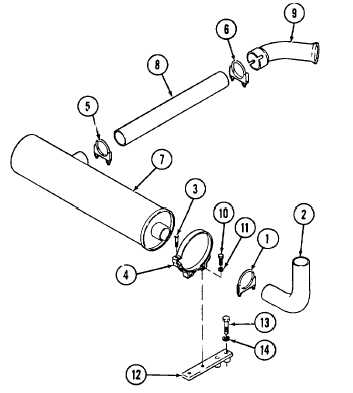
4 Install muffler bracket (12) and secure with bolts
(13) and lockwashers (14).
5 Install mounting bands (4) and secure with screws
(10) and lockwashers (11).
6 Install exhaust pipe (8) with clamps (5 and 6) on
exhaust elbow (9). Do not tighten clamps (5 and
6).
7 Slide muffler (7) through mounting bands (4). Do
not tighten screws (3) on mounting bands (4).
8 Attach exhaust pipe (8) to muffler (7). Tighten
clamps (5 and 6).
9 Tighten screws (3) on mounting bands (4).
10 Install clamp (1) on exhaust elbow (2). Place
exhaust elbow (2) in a vertical position and tighten
clamp (1).
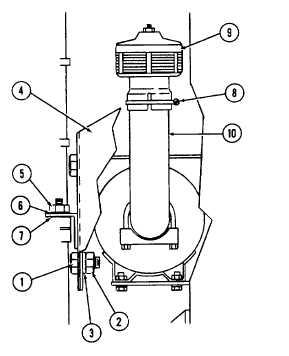
11 Place clamp (8) on spark arrestor (9) and install on
exhaust elbow (10). Tighten clamp securely.
12 Install muffler guard (7) and secure with two nuts
(5) and two washers (6).
13 Install exhaust guard (4) on muffler guard (7) and
secure with two screws (1), two washers (3), and
two nuts (2).
2-111
|