 |
|||
|
|
|||
|
Page Title:
Fuel System. |
|
||
| ||||||||||
|
|
 TM 5-4320-273-14
Operator/crew maintenance of the fuel system con-
sists primarily of the following procedures:
a. Servicing the Air Cleaner.
(1) You should service the air cleaner any time
the air restriction indicator shows red in the sight
area.
(2) Loosen the clamp assembly (1, fig. 3-4) and
remove the dust cap (2) and vacuator valve (3).
Remove the baffle (4) and empty the dust cap and
vacuator valve.
(3) Remove the wing nut (5), and remove the
filter element (6). The element can be dry-cleaned
q
with compressed air, directing the air stream from
the inside out. If time permits, you can also wash the
element with water and, upon completion, air-dry it.
CAUTION
Do not use gasoline, kerosene, or
solvent to clean element; do not oil
element.
(4) Replace the element if it is damaged.
(a) Install
filter element (6, fig. 3-4) in body
and secure with wing nut (5). Install baffle (4) and
vacuator valve (3) on dust cap (2).
(b) Install dust cap (2) on air cleaner body and
secure with clamp assembly (l).
b. Servicing Fuel Tank, Lines, and Fittings. Main-
tenance of the fuel tank, lines, and fittings is nor-
mally confined to such services as filling the tank
with fuel and tightening loose fittings.
(1) Drain the fuel tank by removing the plug and
draining the fuel into a suitable container. Clean the
strainer with a soft-bristled brush to remove em-
bedded material.
(2) Inspect the fuel tank and lines for leaks,
cracks, dents, damaged threads, and broken weld-
ments. You should report any damage to
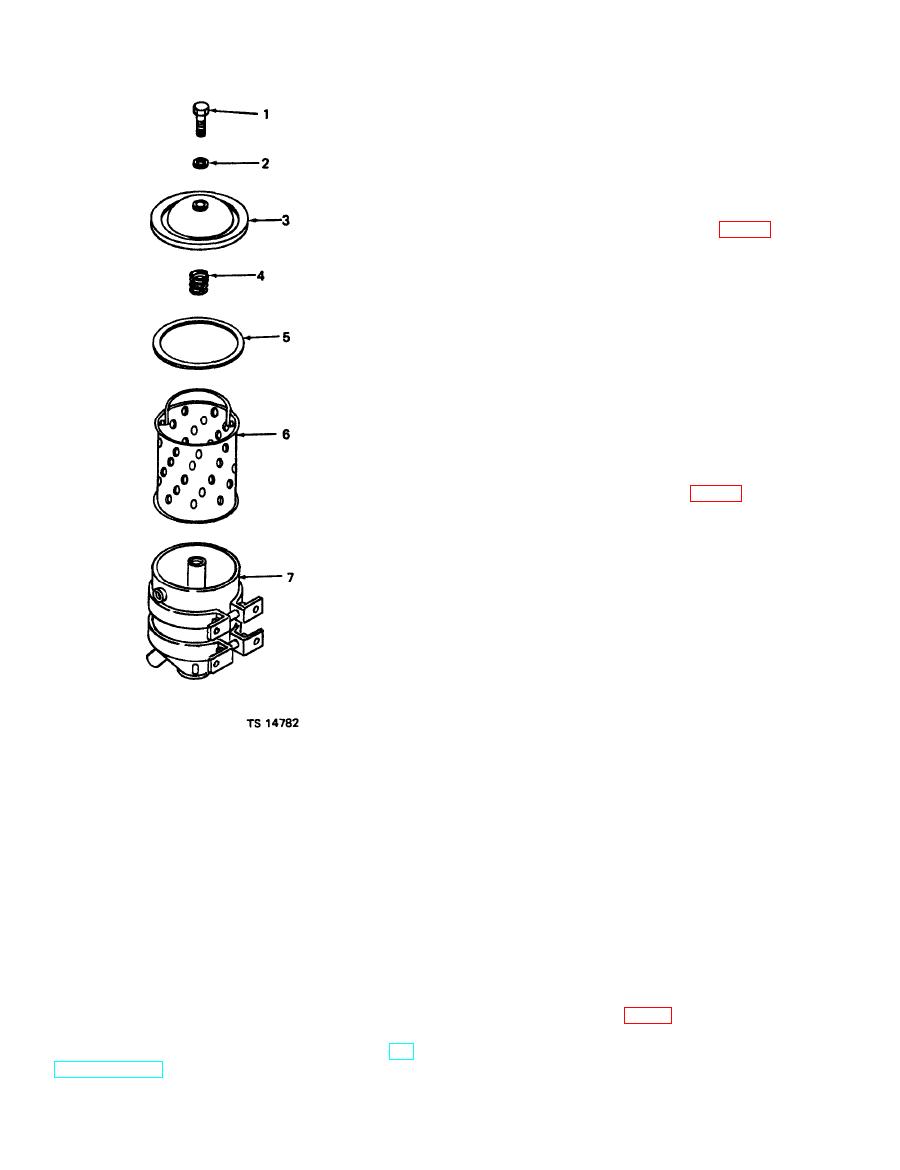
1. Shoulder bolt 5. Gasket
2. Flat washer
6. Filter element
organisational maintenance.
3. Cover
7. Body
(3) Check for clogged fuel lines by loosening the
4. Spring
nut connecting the fuel line to the carburetor. If the
Figure 3-5. Oil filter.
line is open, fuel will drip out at the loosened nut. If
the fuel line is clogged, you should report it to organi-
(2) You can now lift the filter element (6) from the
zational maintenance.
filter body (7). Discard the filter element.
(4) Insert the drain plug and fill the fuel tank to
(3) Wipe the interior of the filter body with a
clean, dry cloth and position a new filter element (6)
the proper level.
c. Servicing the Fuel Strainer. If you observe
in the filter body (7).
moisture or other contaminants in the glass bowl of
(4) Install the gasket (5), spring (4), and cover (3)
the fuel strainer, service the strainer as follows
on the filter body (7). Position the flat washer (2) on
the shoulder bolt (l). Tighten the shoulder bolt to
(1) Turn the fuel source selector valve to OFF
position.
secure the cover.
(2) Loosen the nut (1, fig. 3-6) on the bail assem-
(5) After installing a new filter element, check
bly (2) and swing the bail aside to remove the glass
the oil level dipstick. Add oil if you find the level
fuel bowl (3) and gasket (4). Empty the contents of
below the full mark, but do not overfill. Refer to LO
5-4320-273-12 for recommended oil.
the bowl and wipe it dry with a clean cloth.
|
|
Privacy Statement - Press Release - Copyright Information. - Contact Us |
