 |
|||
|
|
|||
|
Page Title:
Figure 4-16. Suction piping assembly, exploded view. |
|
||
| ||||||||||
|
|
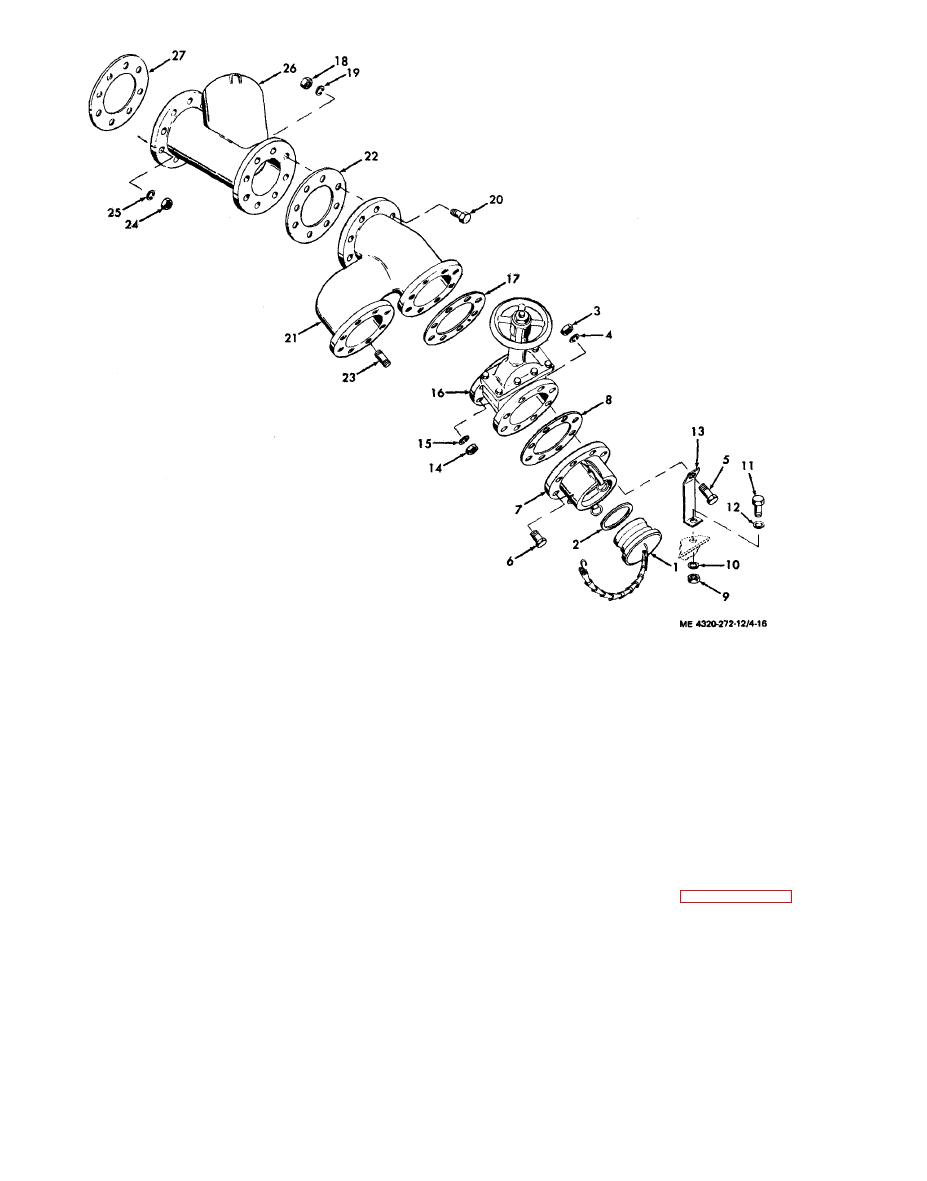 15. Lock washer
1. Dust plug
16. Gate valve
2. Gasket
17. Gasket
3. Nut
18. Nut
4. Lock washer
19. Lock washer
5. Cap screw
20. Cap screw
6. Cap screw
21. Manifold
7. Coupling
22. Gasket
8. Gasket
23. Stud
9. Nut
24. Nut
10. Lock washer
25. Lock washer
11. Cap screw
26. Strainer housing
12. Flat washer
27. Gasket
14. Nut
damaged flanges. Operate the valve handwheel to
b. Cleaning and Inspection. Clean and inspect
check for free operation. Refer to paragraph 4-43
the parts after vou disassemble them, as follows:
for valve repair instructions.
(1) Discard and replace all gaskets. Clean all
(3) Inspect all other piping parts for cracks
remaining parts with cleaning solvent. You can use
and damaged flanges. Inspect the suction manifold
a soft-bristled brush on the strainer backet if
(21) for damaged studs (23 ). Replace as necessary.
necessary to remove clogging.
If you find that the stud mounting holes in the
(2) Inspect the gate valves (16) for cracks and
|
|
Privacy Statement - Press Release - Copyright Information. - Contact Us |
