 |
|||
|
|
|||
|
Page Title:
Figure 3-2. Oil filter replacement. |
|
||
| ||||||||||
|
|
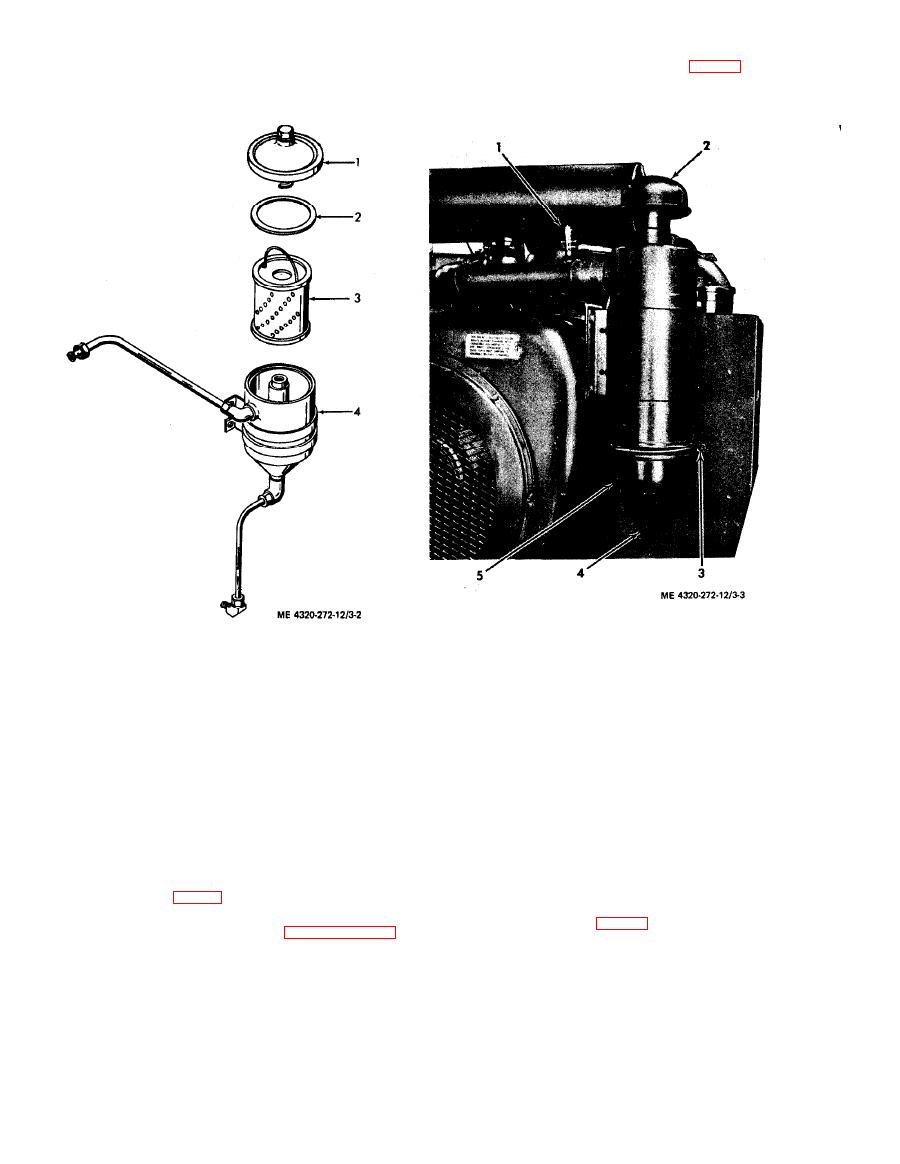 open the lips of the vacuator valve (4, fig. 3-3) to
release the collected dust. This will lengthen the life
of the main filter.
1. Air restriction indicator
4. Vacuator valve
2. Stack cap
5. Dust Cup
1. Cover
3. Element
3. Clamp
4. Body and lines
2. Gasket
(2) Daily, unless experience indicates that it
(2) You can now grasp the filter element (3)
can be done less frequently, loosen the clamp (3)
by its handle and lift it from the filter housing.
and remove the dust cup. Remove the baffle from
Discard the filter element.
the cup and empty the dust. When reinstalling the
(3) Wipe the interior of the filter housing with
baffle in the cup, you must make sure the baffle is
a clean, dry cloth.
properly seated. Check the dust cup sealing edge
(4) Position a new filter element in the filter
for damage. Check the dust cup gasket. Reinstall
housing.
the dust cup and make sure it is properly positioned
(5) Install the cover and gasket on the filter
on the air cleaner body.
and tighten the hex screw at the top of the filter to
(3) Weekly, or any time the restriction in-
secure the cover (1).
dicator shows red in the sight area, service the air
(6) After installing a new filter, check the oil
cleaner element. To remove the element, remove
level dipstick (4, fig. 3-1). It must be up to the full
the cup and baffle as directed in step (2), above.
mark. Add oil if you find the level low, but do not
Remove the wing nut (5, fig. 3-4) and remove the
overfill. Use oil recommended in paragraph 3-3.
element (6). The element can be dry-cleaned with
compressed air. Direct the air stream from the
inside out. If you prefer, you can wash the air
Operator / crew maintenance of the fuel system
cleaner element with soap and water. Dry it with
consists primarily of the following procedures:
circulating air at less than 180oF. Replace element
a. Servicing Air Cleaner.
if any damage is visible. Reassemble the air cleaner.
(1) Daily, or several times a day under ex-
tremely dusty conditions, with the engine stopped,
|
|
Privacy Statement - Press Release - Copyright Information. - Contact Us |
