 |
|||
|
|
|||
|
|
|||
| ||||||||||
|
|
 TM 5-4320-258-34
0.008 inch, clean the mounting surfaces of the flywheel
housing and the block. Recheck flywheel housing
runout. If the runout is still not within limits, replace the
flywheel housing.
Figure 4-13. Checking flywheel housing eccentricity.
4-10.
Pistons and Connecting Rods
a. Removal and Disassembly. With the
engine mounted on an engine overhaul stand, proceed
as follows:
(1) Remove the cylinder head (para 4-3).
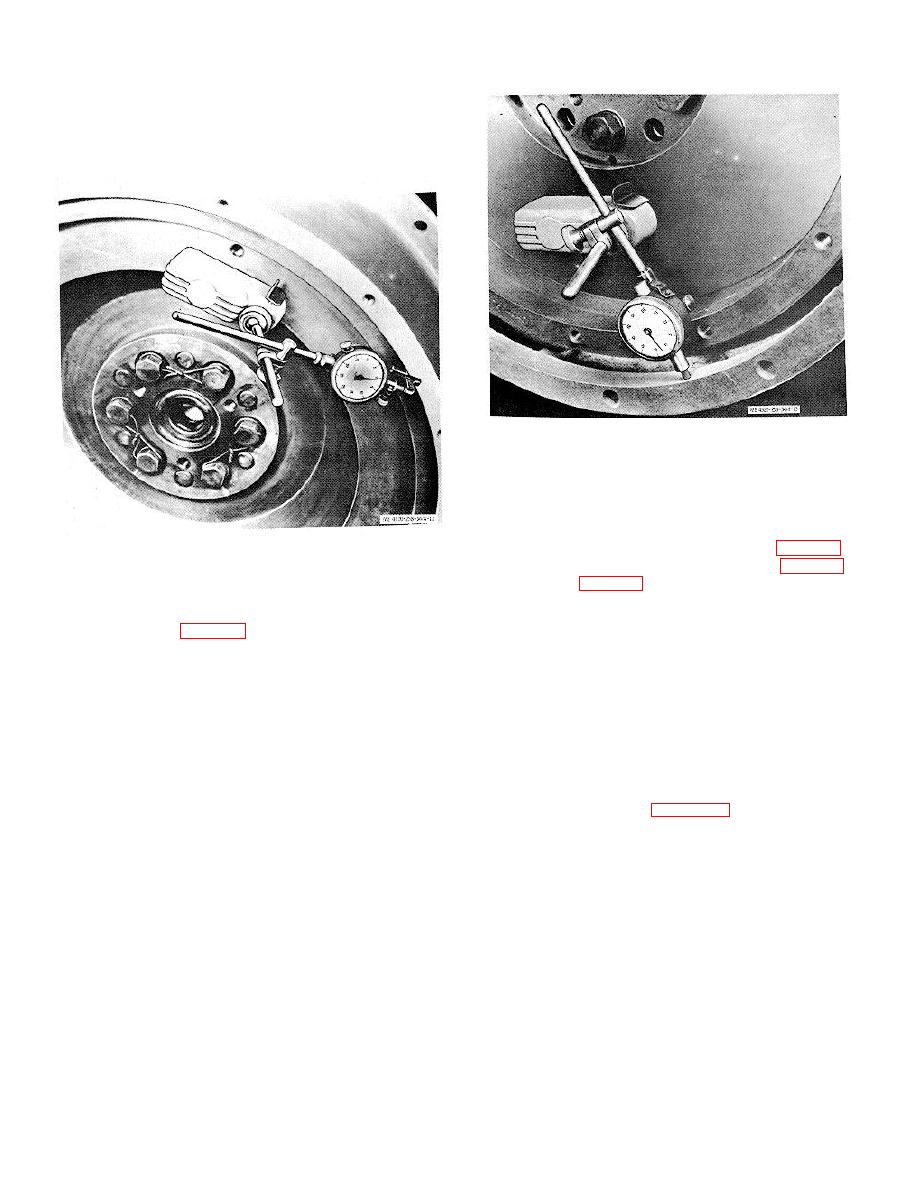
Figure 4-12. Checking flywheel housing runout.
(2) Remove the engine oil pan (para 4-6)
and oil pump (para 4-7).
(6) Check eccentricity of the flywheel
(3) Ream the ridge of the top of each
housing bore by mounting a dial indicator so that it
cylinder bore with a standard ridge reamer. Blow metal
indicates the bore (fig. 4-13); rotate the engine through
fragments from the cylinder with compressed air.
one revolution. If the housing bore is eccentric more
(4) Remove the two cotter pins (10, fig. 4-
than 0.008 inch, loosen the flywheel housing mounting
14) and nuts (11) that secure a bearing cap (13) to a
bolts and tap the housing into its proper position with a
connecting rod (20); remove the cap and bearing shells
soft hammer. Tighten the bolts and recheck eccentricity
(14).
of the housing bore. If the housing cannot be brought
Caution: While pushing the piston and rod
into true position, replace the housing.
from the block, be very careful the connecting rod
does not scratch the cylinder wall.
(5) Push assembled piston (18), rings (17),
and connecting rod (20) up through the top of the block.
(6) Refer to figure 4-14 (items 15 through
20) and disassemble the piston and connecting rod.
rods in sets, and keep the sets together. Also, be sure
each piston and piston rod set is installed in the cylinder
from which it was removed.
4-18
|
|
Privacy Statement - Press Release - Copyright Information. - Contact Us |
