|
| |
TM 10-4930-248-13&P
5-3.
CCR NOZZLE, PISTON MODEL, ASSEMBLY REPAIR - continued.
c.
Assembly - continued.
(14)
Lubricate preformed packing (44) with silicone compound and install into nozzle housing (14).
(15)
Slide nozzle housing (14) into collar (27). Align the notch on the collar (27) with tab on top of
nozzle housing (14).
CAUTION
Use the lug assembly tool to tighten the body. Use the body wrench to
complete the tightening process.
(16)
Push down on nozzle housing (14) and rotate clockwise until tab contacts the collar (27). Rotate
housing (14) counterclockwise until notch and tab are aligned.
(17)
Remove the assembled components from lug assembly tool and remove tool from vise.
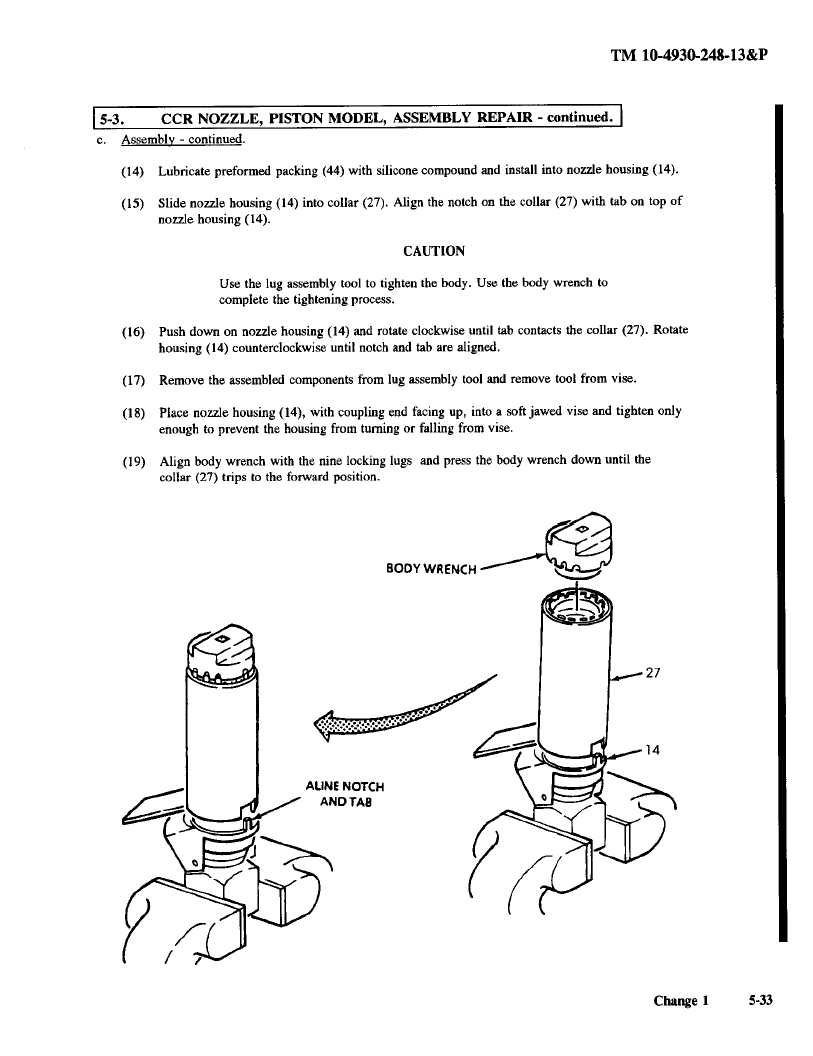
(18) Place nozzle housing (14), with coupling end facing up, into a soft jawed vise and tighten only
enough to prevent the housing from turning or falling from vise.
(19) Align body wrench with the nine locking lugs and press the body wrench down until the
collar (27) trips to the forward position.
BODY WRENCH
27
14
ALINE NOTCH
ANDTAa
27
14
Change 1
5-33
|