|
| |
TM 10-4930-248-13&P
5.2
CCR NOZZLE
ASSEMBLY
REPAIR
- continued
a.
Disassembly
- continued.
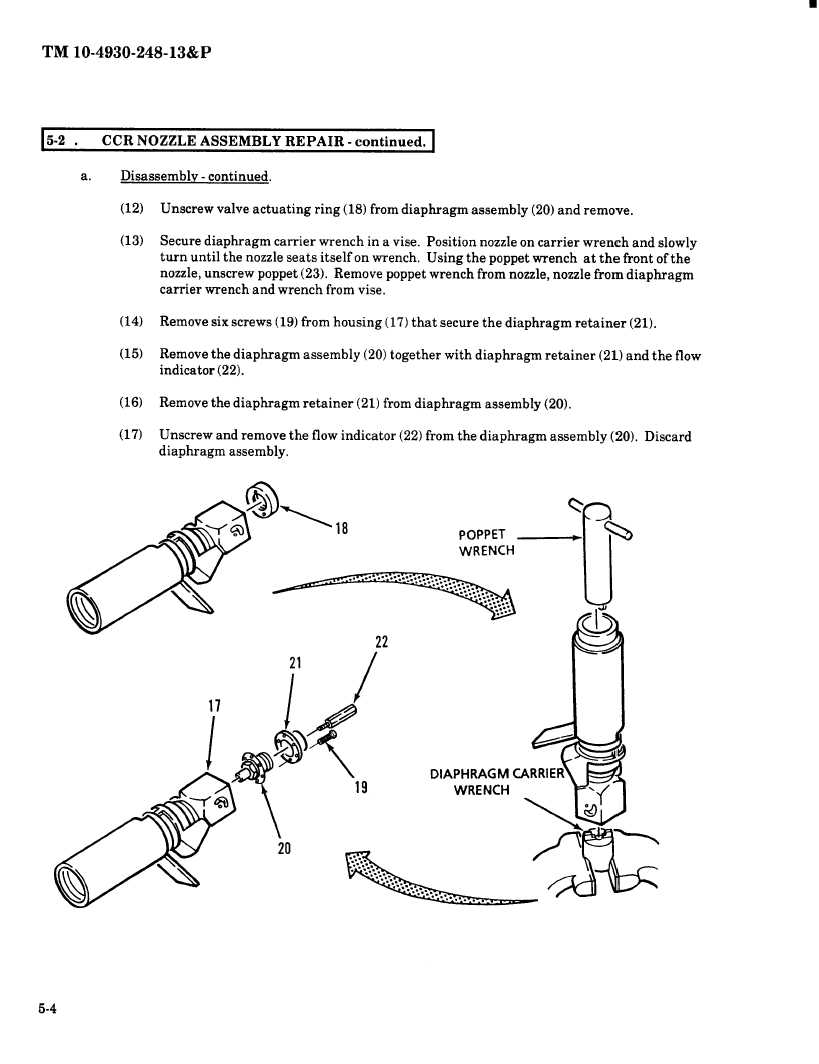
(12)
Unscrew
valve actuating
ring (18) from diaphragm
assembly
(20) and remove.
(13)
Secure diaphragm
carrier
wrench
in a vise. Position
nozzle on carrier
wrench
and slowly
turn until the nozzle seats itself on wrench.
Using the poppet wrench
at the front of the
nozzle, unscrew
poppet (23). Remove poppet wrench from nozzle, nozzle from diaphragm
carrier wrench and wrench
from vise.
(14)
Remove six screws (19) from housing
(17) that secure the diaphragm
retainer
(21).
(15)
Remove the diaphragm
assembly
(20) together
with diaphragm
retainer
(21) and the flow
indicator (22).
(16)
Remove the diaphragm
retainer
(21) from diaphragm
assembly
(20).
(17)
Unscrew
and remove the flow indicator
(22) from the diaphragm
assembly
(20). Discard
diaphragm
assembly.
18
POPPET
WRENCH
22
2
17
1
DIAPHRAGM
CARRIER
19
WRENCH
20
Rk@@@
CV
"le
5-4
|