|
| |
TM 10-4930-245-13&P
5-2.
CCR NOZZLE ASSEMBLY REPAIR - continued.
(18)
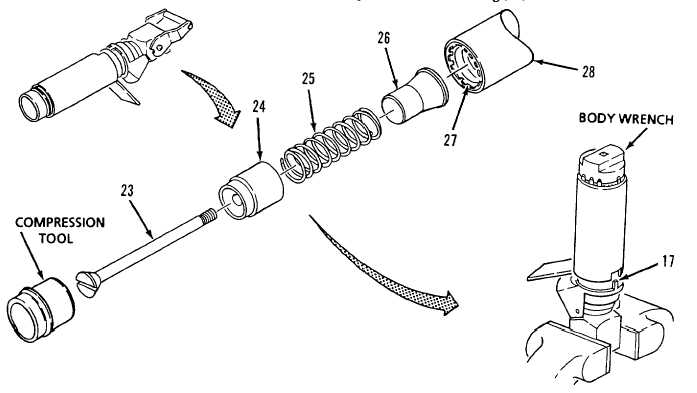
While holding the piston compression tool, slowly pull back the collar (28). Spring (25) will push the
piston compression tool, poppet (23) and sleeve seal (24) out of body (27).
(19)
Remove spring (25) and flow guide (26) from the nozzle discharge end.
(20)
Apply alcohol around collar (28) and body (27).
(21)
Place housing (17) into a soft face vise with discharge end facing up, and tighten only enough to
prevent housing from turning or falling from vise.
CAUTION
Failure to trip the latch mechanism will result in damage to the stayback
detents during following steps.
(22)
Align the body wrench with the nine locking lugs (35) and press until the collar (28) trips in the forward
position.
WARNING
Body is under spring pressure. Keep pressure on body wrench to prevent
sudden separation.
CAUTION
To reduce the friction between the locking lugs and the collar, slightly pull
back on the collar. (23) Turn the body wrench and loosen body (27) from the
housing (17).
5-5
|