|
| |
TM 10-4930-238-12&P
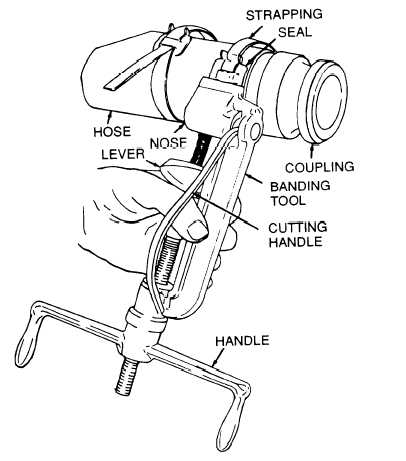
b. Repair. (Refer to Figure 4-7.)
(1)
(2)
(3)
(4)
(5)
(6)
(7)
(8)
Cut strapping and remove damaged coupling.
If hose is damaged within 10 feet (304.8 cm) of end of hose, cut strapping material and remove
coupling.
Cut hose and remove damaged area.
Insert new coupling in hose.
Slide seal on strapping material and bring end of strapping around hose adjacent to barb on cou-
pling shank. Wrap strapping around hose twice and again run end through the seal.
Place strapping in open slot of banding tool nose and slide in.
With thumb on band gripper lever, apply tension by turning handle of tool. After tension is created,
it is no longer necessary to hold band gripper lever as it locks itself under tension.
Place finger on strapping material at seal bridge while tensioning with tool handle. (Turn handle
clockwise).
Figure 4-7. Hose Assembly Repair.
4-13
|