|
| |
TM 10-4320-324-14
b.
Disassembly.
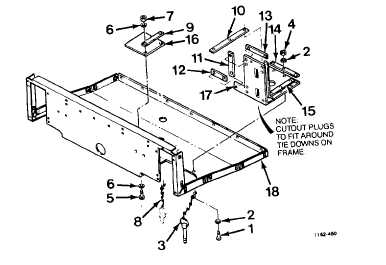
(1)
Remove 32 screws (1), 64 flat washers (2), pin assembly (3), and 32 self locking nuts (4).
(2)
Remove four screws (5), eight flat washers (6), four self locking nuts (7), and pin assembly (8).
(3)
Remove retainers (9 thru 15), flap (16), and tie down seal (17) from bottom rear panel (18).
(4)
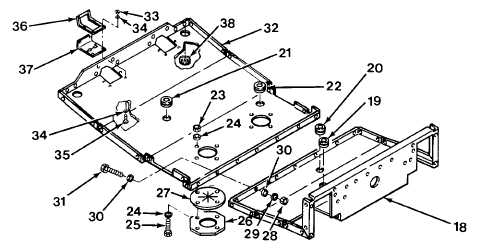
Remove grommets (19 thru 22).
(5)
Remove eight self locking nuts (23), 16 flat washers (24), eight screws (25), retainer (26), and valve (27).
(6)
Remove nine nuts (28), nine lockwashers (29), 18 flat washers (30) and nine screws (31). Separate bottom
rear panel (32) from bottom front panel (18).
(7)
Remove eight self-locking nuts (33), 16 washers (34), eight screws (35), two retainers (36), and two tiedown
seals (37).
(8)
Remove two jack plugs (38).
c.
Cleaning/Inspection.
(1)
Inspect valves for holes or tears. Replace if defective.
(2)
Inspect all sheet metal parts for holes, cracks, deformation, or other obvious damage. Replace if defective.
4-79
|