|
| |
TM 10-3835-231-13
5-4. HOSE REPAIR (HOSES WITH BAND TYPE CLAMPS) - continued
(2)
Remove key rings (5).
(3)
Cut band clamps (6).
(4)
Remove gaskets (7) from coupling (3) and cap (2).
(5)
Remove couplings (3) and (4) from hose (8).
b.
Repair. Replace all defective parts to extent necessary for repair.
c.
Assembly.
(1)
Coat hose connector ends (3) and (4) with petrolatum to ease installation and insert connectors into hose
(8).
(2)
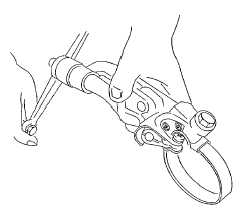
Place "Heavy Duty Jr Adapter" tool on nose of the "Band-It" tool.
Figure 5-2. Band Clamp Tool Setup
(3)
Position as shown and tighten two set screws. End of screw should not extend beyond bottom of screw
block.
(4)
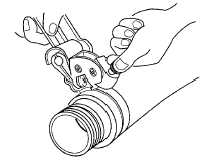
Insert clamp tail into adapter nose and grip tail end with gripper lever.
(5)
Insert hose in clamp. Tension clamp by turning tool handle.
Figure 5-3. Tool Tensioning
5-3
|